Getting Started
The following represents basic information that an RSA SecurID Agent administrator should know. This information will help in problem determination and assist in the smooth running of the system.
If errors occur which cannot be transmitted to the operator, the system will dump the error to the output queue (QEZDEBUG) on the system on which it has occurred.
Configuring RSA SecurID Agent Maintenance
The RSA SecurID Agent Maintenance program allows you to configure the TCP/IP network between the IBM i agent and the RSA Authentication Manager (ACE/Server) machine.
- On the IBM i command line, run WRKSECURID to launch SecurID.
- On the Master Menu, choose 1 to open the Powertech RSA SecurID Agent Maintenance screen.
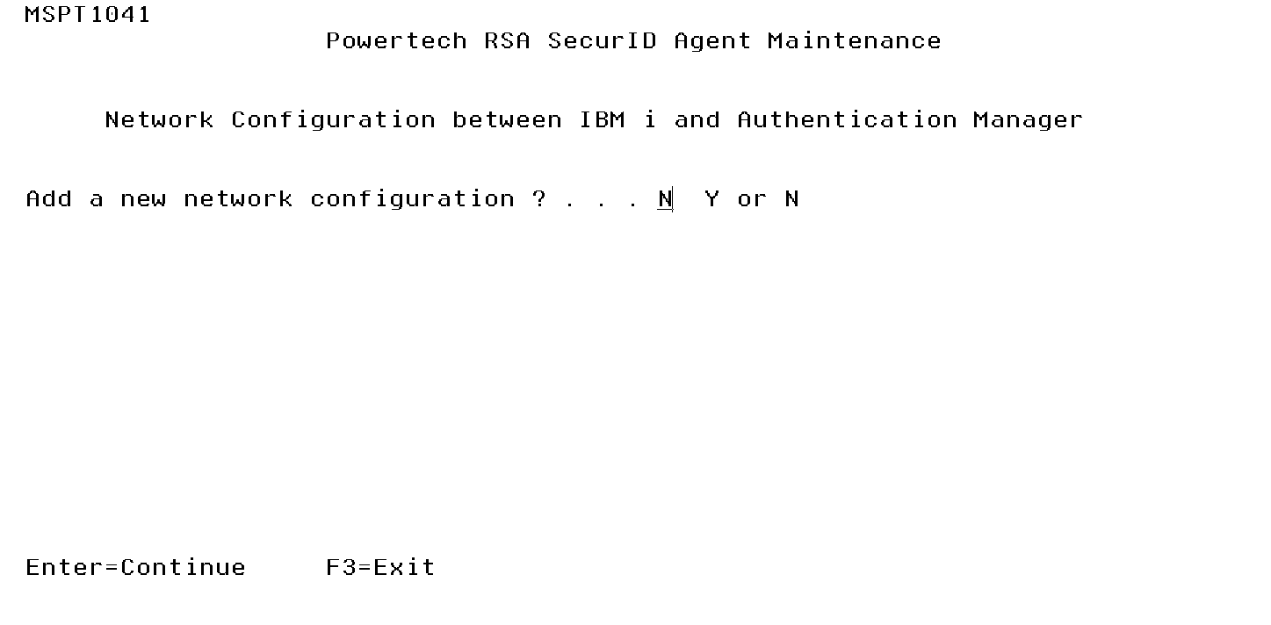
- Enter Y to open the Network Configuration portion of the Powertech RSA SecurID Agent Maintenance screen, where you can configure a new TCP/IP network configuration between the IBM i and RSA Authentication Manager (ACE/Server) machine. If the appropriate configuration already exists, enter N and skip to step 4.
- Specify the internet address to which the machine running IBM i responds. This address, associated with a line description and a subnet mask, defines the TCP/IP interface necessary for communication between IBM i and RSA Authentication Manager (ACE/Server) machine.
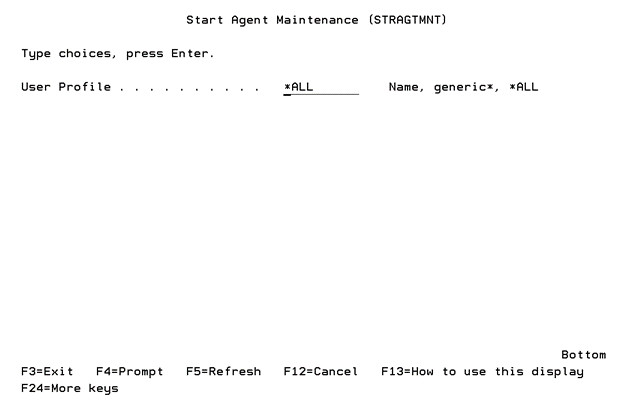
- On the Start Agent Maintenance screen, enter the name of the profile(s) to be displayed. The default value, *ALL, will result in the display of all the profiles that exist on your IBM i (with the exception of QSECOFR). You can selectively activate SecurID Agent authentication for any of the users displayed. There is also a 'position to' facility to help you find the required user quickly.
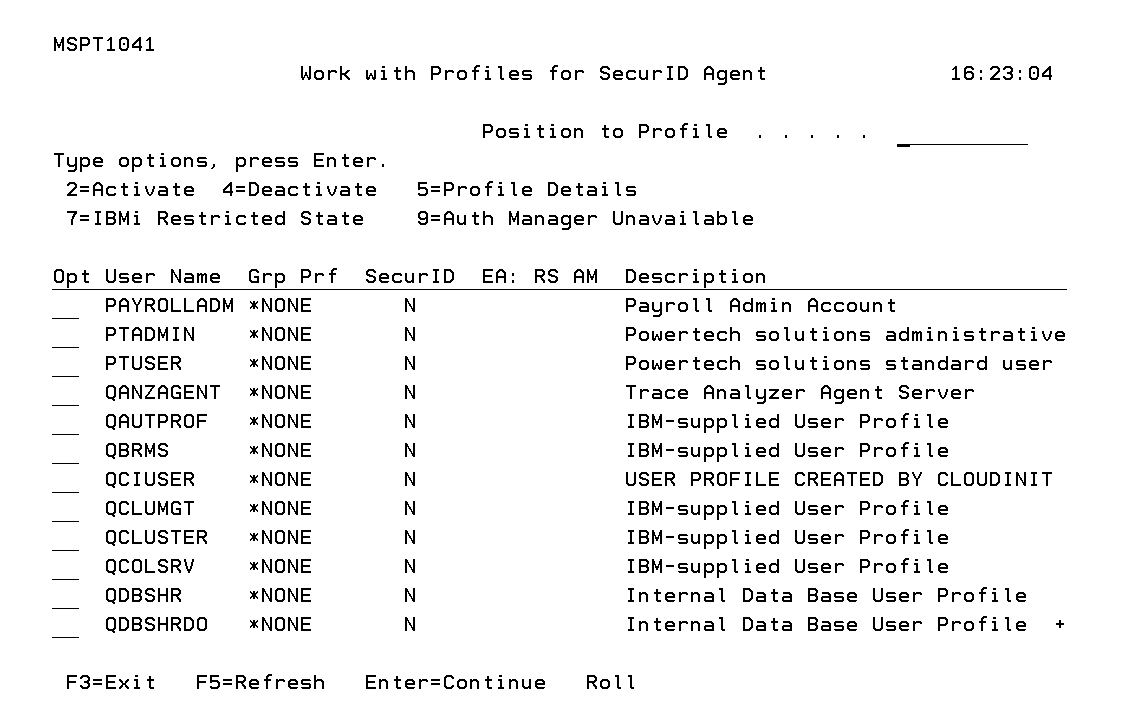
- Press ENTER. The Work with Profiles for SecurID Agent screen appears.
- Use the available options to activate or deactivate authentication for user profiles. To activate QSECOFR, see Configuring Authentication for the QSECOFR Profile, the Activating QSECOFR section.
Choose 2 for a user profile to activate authentication. This means the profile will be challenged with authentication when they sign on to the IBM i.
Choose 4 for a user profile to deactivate authentication. This means the profile will no longer be challenged with authentication when they sign on to the IBM i.
NOTE: See Work with Profiles for SecurID Agent screen for a description of all options on this screen.

The internet address is specified in the form nnn.nnn.nnn.nnn where nnn is an integer value between 0 and 255.