Add Managed Task Wizard |
Overview
The Add Managed Task Wizard is designed to simplify task creation by guiding you through the fundamental steps of creating an Automate task. This includes producing and naming the new task, attaching one or more triggers required to run the task automatically, constructing the steps that sequentially perform the work, and configuring optional error handling, logon and user related properties.
To Create a Task Using the Add Managed Task Wizard
-
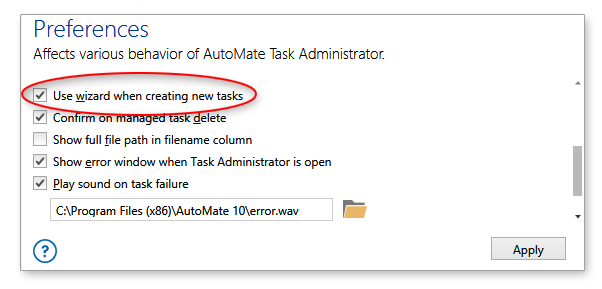
First, confirm that the Add Managed Task Wizard is turned on. From Task Administrator, navigate to Options > Preferences.
-
Make sure Use wizard when creating new tasks is enabled (default, as shown below), and then click Apply to save changes.
-
Select Tasks from the Navigation bar.
-
Select which Automate client you wish to create a new task on. Automate supports creation of tasks that reside on a remote client (or Runtime), however, there are limitations. For more details, see Managing Remote Tasks.
-
Select the folder you wish to create the new task in. To create a new folder, see Organizing Tasks & Folders.
-
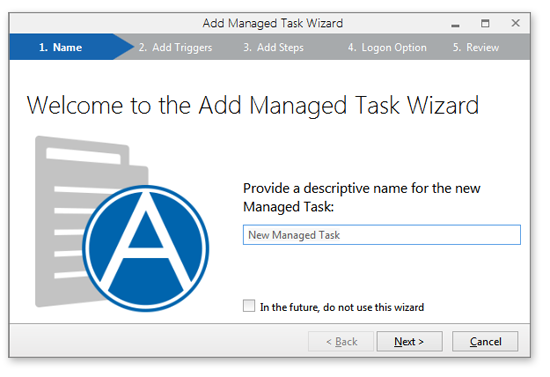
Click the New button located on the Top panel or right-click an empty space inside the folder, and then select New > Managed Task. The Add Managed Task Wizard dialog appears.
Add Managed Task Wizard Dialog
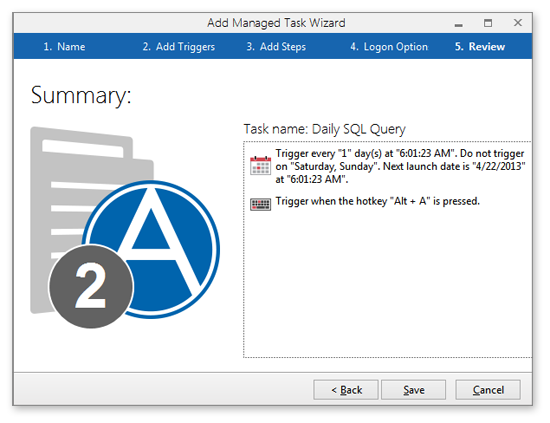
For easy navigation, the top portion of the Add Managed Task Wizard displays the flow of available steps which are selectable in case you need to jump directly to a particular step. In addition, you can use the Forward or Back buttons to move up or down one step. For easy verification, information about the managed task, such as its properties and attached triggers (if any) are displayed upon completion.
 1.
Welcome
1.
Welcome
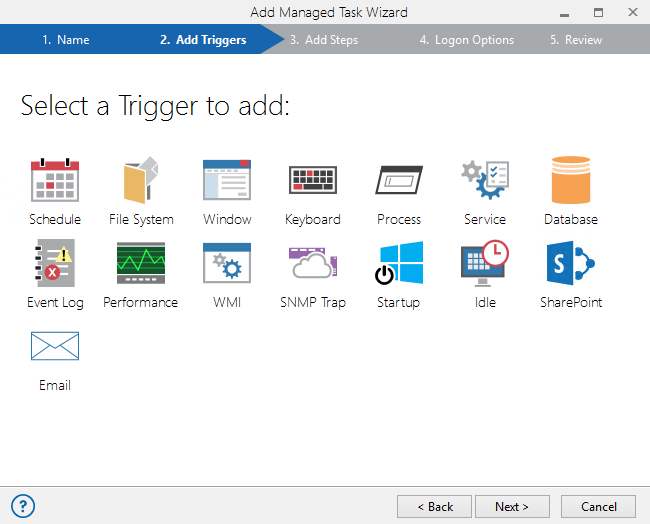
2.
Add Triggers
3.
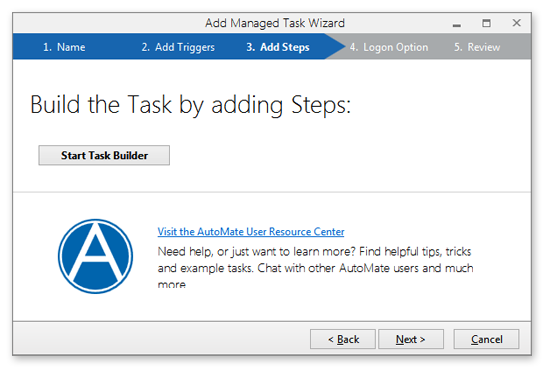
Add Steps
4-a.
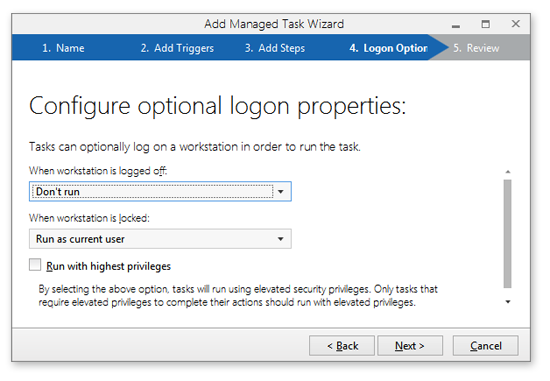
Logon Options
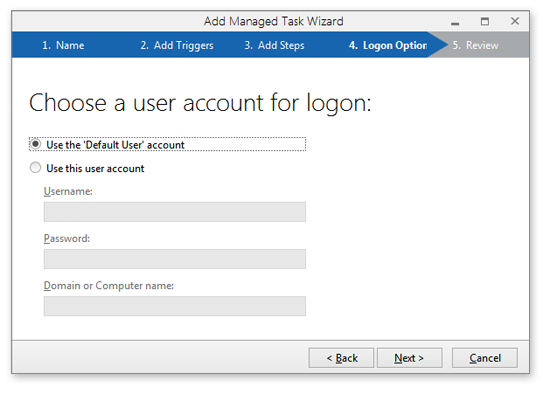
4-B. User Account
5.
Review