Recorder
Overview
The Automate Desktop Recorder is a powerful feature that simplifies the process of automating and recording user interface interactions and actions in Automate Desktop. By using the Recorder's intuitive interface, you can quickly and easily create and add recordings to new or existing tasks. For details on the interactions and actions available with the Recorder, see Interactions and actions.
To open the Recorder
-
Open Automate Desktop 2024 Task Builder.
-
From the Recorder section of the Task Builder ribbon, select New Recording.
.png)
Related Topics
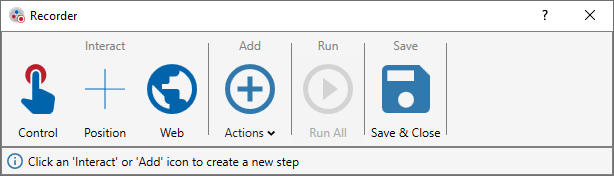
 Recorder controls
Use the Recorder controls to add interaction and action steps to a recording, run all of the current steps in sequential order, or save the recording at any point and return to the Task Builder. This section explains the purpose of each control and how to use them. For information on how to create, edit, split, or delete recordings, see Create and manage recordings.
Control
The Recorder can interact with a user interface control (for example, a button, drop-down combo box, text box, checkbox, menu list, column header, etc.) in various ways. Some controls allow several different interactions, while others may only offer a few. The Recorder uses Automate Desktop's Window Dissection technology to determine if a control is supported and what interactions are available with it.
To interact with a control in a window
-
Select Control.
-
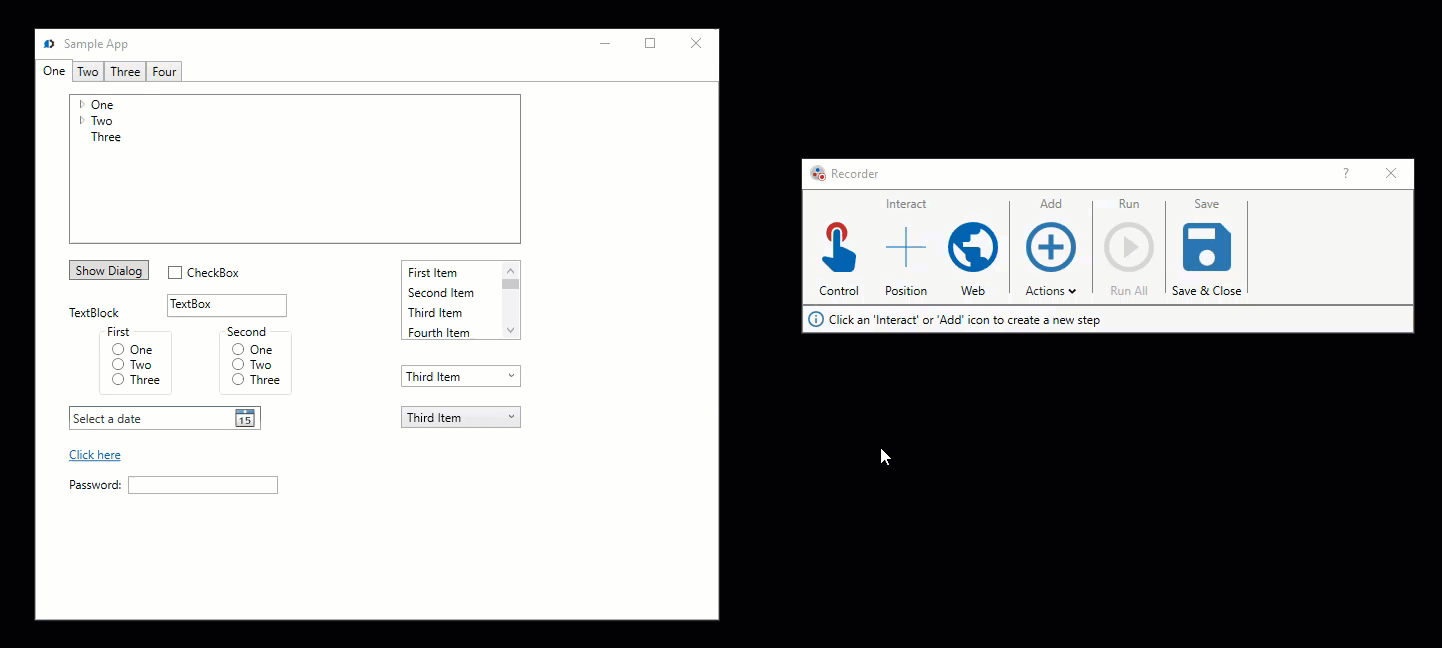
Hover your mouse pointer over the desired user interface control in a window until a green border appears (red indicates the control is not selectable), and then left-click on it. An Interact with step is added to the Recorder. To view an example of selecting a control, see the GIF image below.
NOTE: If a green border does not appear around the control, use the Position interaction instead. -
To provide details of which control is being is interacted with in the step, click on the default control label (blue underlined text) and rename it to be more descriptive (for example, "Chrome shortcut icon"). For label examples, see Examples.
-
By default, the Recorder selects the interaction that best suites the control in the first box within the step. Click the box to view or select from the other available options. Depending on your selection, additional boxes may appear containing parameters required to complete the interaction step.
For more details on Control interactions and how to configure them, see Interactions and actions.
Position
The Recorder can move the mouse pointer to any position relative to a window of an application or the overall available screen resolution, and then click, hold, or release the left, right, or center mouse button. This interaction is useful for automating steps such as opening/closing an application, opening the Start menu in Windows, clicking on a tab in a window, etc.
To move the mouse pointer to a position and then perform a click action
-
Select Position.
-
Left-click on the desired position on the window or screen. A Move mouse to position relative to step with the pixel coordinates of the position is added to the Recorder.
-
To provide details of what the mouse pointer is interacting with in the step, click on the default position label (blue underlined text) and rename it to be more descriptive (for example, "Chrome shortcut icon"). For label examples, see Examples.
-
Click the first box within the step to select if the pixel coordinates are relative to the window of the application (if applicable) or the overall screen resolution.
-
Click the second box to select the desired click action to occur (if any).
-
Depending on the click action selected in the second box, click the third box to select the mouse button to use to execute the click action defined in the second box.
For more details Position interactions and how to configure them, see Interactions and actions.
Web
The Recorder can open, close, and interact with web browser controls and web pages/tabs in various ways.
To interact with a web browser
- Select Web.
- If a web session is not currently open, enter the desired name for the web session in the Name box or use the default "Web Session <#>" name. If a web session is currently open, proceed to step 7.
- Select the Browser box to select the desired web browser.
- Enter the desired URL in the URL box (for example, fortra.com, www.fortra.com or https://www.fortra.com).
- Select Save and Open to run the step and open the web browser to the specified URL.
-
When the web page opens, hover the mouse pointer over the desired web control until a green or blue border appears (red indicates the control is not selectable), and then left-click on it. An Interact with step is added to the Recorder.
NOTE: A slight delay may occur after selecting certain controls. - To add additional web interaction steps, select Web from the Recorder, hover the mouse pointer over the desired web control in the web browser until a green or blue border appears (red indicates the control is not selectable), and then left-click on it.
- To provide details of which control is being interacted with in the step, click on the default control label (blue underlined text) and rename it to be more descriptive (for example, "Images button"). For label examples, see Examples.
- By default, the Recorder selects the interaction that best suites the control in the first box within the step. Click the box to view or select from the other available options. Depending on your selection, additional boxes may appear containing parameters that are required to complete the interaction step.
For more details on Web interactions and how to configure them, see Interactions and actions.
Actions
In some scenarios, an interaction step may require an action step to follow it to execute the intended interaction. The available options are:
Wait
The Wait action inserts a pause in the recording that waits for a window to appear or a specified amount of time to pass before the recording can continue. For example, if a recording contains interaction steps to open an application and then click on a control in the main window of the application, follow the interaction step to open the application with a Wait action step that specifies the number of seconds it takes for the application to open, or to wait for the default window of the application to appear before the interaction step to click on the control can execute.
To wait for a specified amount of time or for a window to appear
- Select Actions, and then select Add wait. A Wait for step is added to the Recorder.
- Select the first box within the step to select to wait a specified amount of time, or for the existence of a window before the step can execute.
- Select the second box to select the desired time measurement or the available window, based on your selection in the first box.
Keyboard input
The Keyboard input action can enter keystrokes in a box (for example, entering a person's name in a Name box) or perform them on a window (for example, CTRL + ALT + DEL). For example, if a recording contains an interaction step to select a Username box to enter login credentials, follow that step with a Keyboard input action step to enter the desired username in the box.
To perform keystrokes
-
Select Actions, and then select Add keyboard input. An Input from keyboard step is added to the Recorder.
-
Select the first box within the step to select the type of keyboard input action to occur.
-
Select the second box to enter or select the keystrokes to perform, based on your selection in the first box.
Run application
The Run application action runs the application, program, or document specified. If a document is specified, the application associated with the document will be used to open it.
To run an application
-
Select Actions, and then select Run application.
-
Select the folder icon to browse to the desired file (for example, filename.exe).
-
Select the desired file, and then select Open. A Run application step is added to the Recorder.
Open web browser
The Open web browser action opens a web browser at the specified URL and establishes a session of where to correlate subsequent browser-related steps.
To open a web browser to the specified URL
-
Select Actions, and then select Open web browser.
-
Enter the desired session name in the Name box.
-
Select the Browser box to select the desired web browser.
-
In the URL box, enter the desired URL (for example, fortra.com, www.fortra.com or https://www.fortra.com).
-
Select Save and Open to run the step and open the web browser to the specified URL. An Open <web session name> step is added to the Recorder.
For more details on Actions and how to configure them, see Interactions and actions.
Run All
To run all the current steps in the recording sequentially, select Run All.
Save & Close
To save your recording and return to the Task Builder, select Save & Close.
Create and manage recordings
Create a recording
Recordings can contain several different interactions and action steps, based on what you want to automate.
To create a recording
-
Open the Recorder.
-
Using the Recorder's controls, select Control, Position, Web, or Actions to add the desired interaction or action step to your recording.
-
After configuring the step, select the Run button
 within the step to ensure the interaction executes correctly.NOTE: If the step does not run as intended, you may need to use a different type of interaction or action step to achieve the desired result.
 -
Repeat steps 2 and 3 until all desired interaction and/or action steps are added.
-
To delete a step, select the vertical ellipsis button
 on the desired step, and then select Delete.
 -
To reposition a step, click and drag the step to the desired position.
-
To run all the current steps in the recording sequentially, select Run All.
-
When you are finished building your recording, select Save & Close. Your recording is displayed in the Task Builder as a Recording region with the date and time it was saved.
NOTE: Some interactions steps may appear as more than one step in the Task Builder. -
To add a non-native Recorder interaction and/or action step to a recording, add the step to the Task Builder, and then drag and drop it into the Recording region at the desired position. You can also split a recording and then insert non-native Recorder steps between Recording regions.
To edit your recording in the Recorder or Task Builder, see Edit a recording.
To split your recording into multiple Recording regions, see Split a recording.
To delete your recording, see Delete a recording or step.
Edit a recording
Changes to existing recordings can be made in the Recorder or Task Builder.
To edit a recording in the Recorder
-
From the Task Builder Step Panel, select the Recording region.
-
From the Recorder section of the Task Builder ribbon, select Edit .
-
To add and configure a new step, select the Control, Position, Web, or Actions Recorder control. After configuring the step, click the Run button
within the step to ensure the interaction executes correctly. NOTE: If the step does not run as intended, you may need to use a different type of interaction or action step to achieve the desired result. -
To move an existing step from one recording to another, drag the step from a recording and then drop it to the desired position in move a step from another recording within in the same task, drag and drop it from
-
To delete a step, select the vertical ellipsis button
on the desired step, and then select Delete. -
To reposition a step, click and drag the step to the desired position.
-
When you are finished making changes, select Save & Close. The changes you made to your recording now appear in the Task Builder.
To edit a recording in the Task Builder
-
While in Visual mode in the Task Builder Step Panel, double-click on the desired step within the Recording region to open its Action Properties window.
-
Make the desired changes, and then select OK.
-
From the Task section of the Task Builder ribbon, select Run to test your changes.
Split a recording
Recordings can be split into multiple Recording regions for organizational and maintenance purposes.
To split a recording:
-
From the Task Builder Step Panel, select the desired step within the Recording region of where you want the split to occur.
-
From the Recorder section of the Task Builder ribbon, select Split. The recording is now split at the selected step.
-
Recordings that have already been split can be split further, if desired.
Delete a recording or step
Delete a recording
To delete a recording region
From the Task Builder Step Panel, right-click on the Recording region header or footer, and then select Delete.
Delete a step
To delete a step in the Recorder
- Open the Recorder.
- Select the vertical ellipsis button on the desired step, and then select Delete.
To delete a step in the Task Builder
From the Task Builder Step Panel, right-click on the desired step within the Recording region, and then select Delete.
Interactions and actions
The interactions and actions available with the Recorder are based on Input, Interactivity, Wait, and Web Browser activities. Below is a complete list of interactions and actions the Recorder can perform. For more information on an activity, click the corresponding link:
| Step Type | Icon | Interaction/Action | Activity | Description |
|---|---|---|---|---|
| Control interactions |

|
Check | Interactivity - Check | Use this interaction to select a checkbox or radio button in an open application window. |
| Check if | Interactivity - Check | Use this interaction to enter a valid BASIC expression in the box provided to select the designated checkbox or radio button in an open application window if it is not currently selected. | ||
| Toggle | Interactivity - Check | Use this interaction to select or clear the designated checkbox in an open application window, based on its current state. | ||
| Uncheck | Interactivity - Check | Use this interaction to clear the designated checkbox in an open application window. | ||
| Uncheck if | Interactivity - Check | Use this interaction to enter a valid BASIC expression in the box provided to clear the designated checkbox in an open application window if it is currently selected. | ||
| Get items | Interactivity - Get items | Use this interaction to retrieve one or more items
from a list, a tree view, or a drop-down combo box control in an open application window and then save the items in a preexisting variable, or a new or preexisting dataset. To configure this interaction, select Variable or Dataset from the second box, and then enter or select the desired variable or dataset in the box provided. |
||
| Get selected item | Interactivity - Get selected tree item | Use this interaction to retrieve the currently selected (highlighted) item in a tree view or
tree control from an open application window and then populate a new or existing variable or dataset with the results. To configure this interaction, select Variable or Dataset from the second box, and then enter or select the desired variable or dataset in the box provided. |
||
| Get selected item(s) | Interactivity - Get selected list item | Use this interaction to retrieve the first item, last item, or all items from a list of currently
selected (highlighted) items in a list box or list view control from an open application window, and then populate
a variable or dataset with the results. To configure this interaction:
|
||
| Get text | Interactivity - Get text | Use this interaction to extract the text contents of a control from an open application window and then save the results in a variable. Use the box provided to enter or select the desired variable. | ||
| Mouse to | This single interaction is comprised of two activities: | Use this interaction to move the mouse pointer to the center of a control in an open application window, such as a button, tab, text box, link or column header and then perform a click action. To configure this interaction, select the click action you want to perform with the mouse, followed by the button to execute the click action. The available options are:
NOTE: If a green border does not appear around the control, use the Position interaction instead. |
||
| Select | Interactivity - Select item | Use this interaction to select the designated item from a list view, tree view, or box in an open application window. | ||
| Select if | Interactivity - Select item | Use this interaction to enter a valid BASIC expression to select the designated item from a list view, tree view, or box in an open application window if it is currently not selected. | ||
| Select item | Interactivity - Select item | Use this interaction to select an item from a drop-down combo box or menu in a open application window (for example, clicking the File menu in the Notepad application, and then selecting the Open command). To configure this interaction, select the desired item from the second box. |
||
| Select list item | Interactivity - Select list item | Use this interaction to select items from a list view or list control in an open application window. To configure this interaction:
|
||
| Set text | Interactivity - Set text | Use this interaction to enter text inside of a control in an open application window (for example, a password box) using the box provided. | ||
| Position interactions |

|
Move mouse to position | This single interaction is comprised of two activities: | Use this interaction to move the mouse pointer to the specified pixel coordinates and then perform a click action with the designated mouse button. To configure this interaction:
|
| Web interactions |  |
NOTE: The Recorder is only compatible with Chrome, Edge, and Firefox web browsers.
|
||
| Check | Web Browser - Check | Use this interaction to select a checkbox or radio button on a web browser page in an established session. | ||
| Check if | Web Browser - Check | Use this interaction to enter a valid BASIC expression in the box provided to select the designated checkbox or radio button on a web browser page in an established session, if it is not currently selected. | ||
| Toggle | Web Browser - Check | Use this interaction to select or clear the designated checkbox on a web page in an established session, based on its current state. | ||
| Uncheck | Web Browser - Check | Use this interaction to clear the designated checkbox on a web page in an established session. | ||
| Uncheck if | Web Browser - Check | Use this interaction to enter a valid BASIC expression in the box provided to clear the designated checkbox on a web page in an established session, if it is not currently selected. | ||
| Click | Web Browser - Click | Use this interaction to perform a mouse click action on web page control in an established session. To configure this interaction, select the click action you want to perform with the mouse, followed by the button to execute the click action. The available options are:
|
||
| Close Browser | Web Browser - Close | Use this interaction to close the specified web browser window and end its associated session. | ||
| Extract Table | Web Browser - Extract table | Use this interaction to extract the contents of a table from a web page in an established session and then create and populate a dataset with the results. Any HTML code in the table’s
cells is stripped out. To configure this interaction, enter or select the desired dataset in the box provided. |
||
| Get URL | Web Browser - Get URL | Use this interaction to retrieve the URL from a web page in an established session and then populate a variable with the result. | ||
| Get Value | Web Browser - Get value | Use this interaction to get the value of a given HTML element from a web page and then populate
a variable or dataset with the results. To configure this interaction, select Variable or Dataset from the second box, and then enter or select the desired variable or dataset in the box provided. |
||
| Navigate Back | Web Browser - Back | Use this interaction to navigate one step backward in the history of the currently active web browser tab in an established session. | ||
| Navigate Forward | Web Browser - Forward | Use this interaction to navigate one step forward in the history of the currently active web browser tab in an established session. | ||
| New Tab | Web Browser - New tab | Use this interaction to open a new tab in an existing web browser session. | ||
| Open | Web Browser - Open | Use this interaction/action to open a web browser at the specified URL and establish a session of where to correlate subsequent web browser-related
interactions.This interaction/action is configured by either selecting the Web interaction icon (if a web session is not currently established) or Actions > Open web browser. To configure this interaction/action, choose the first box to select the desired web browser, enter the desired URL in the second box, and then select Save and Open.
|
||
| Refresh Page | Web Browser - Refresh | Use this interaction to refresh the currently active web browser page in an established session. | ||
| Select item | Web Browser - Select list item(s) | Use this interaction to select item(s) from a list view or list control on the currently active web browser web page in an existing web browser session. To configure this interaction:
|
||
| Set value | Web Browser - Set value | Use this interaction to set the specified value for a control on web page in an established session using the box provided. | ||
| Set URL | Web Browser - Navigate | Use this interaction to navigate to the specified page URL in an established web browser session. Use the box provided to specify the desired URL. | ||
| Switch to | Web Browser - Switch tab | Use this interaction to switch between open web browser tabs in an established session, based on the specified identifier. To configure this interaction, specify the identifier type in the first box, and then enter corresponding identifier text in the second box. The available options are:
|
||
| Wait actions |

|
Time | Wait - For duration | Use this interaction to wait for the specified amount of time before moving to the next step in the recording. To configure this action, enter a numeric value in the first box, followed by the desired time measurement (for example, 10 seconds). The available options are:
|
| Window | Wait - For window | Use this interaction to wait for the specified application window to appear before moving to the next step in the recording. To configure this action, click the box to select the desired application window. |
||
| Keyboard input actions |

|
Keys | Input - Send keystrokes | Use this action to enter the desired alpha-numeric keystrokes in the box provided. Keystrokes are case sensitive. |
| Special keys | Input - Send keystrokes | Use this action to send the specified keystrokes to the currently focused window. To configure this action, click the box to select single or multiple keystrokes of special keys (for example, CTRL+ALT+DEL). The available options are:
|
||
| Hold key | Input - Hold key | Use this action to hold the specified keys down until a Release
key step is encountered. The available options are:
|
||
| Release key | Input - Release key | Use this action to release the specified keys that were previously held down using a
Hold key step. The available options are:
|
||

|
Run | Run - Run | Use this action to run the application, program, or document specified. If a document is specified, the application associated with the document will be used to open it. To configure this action, click the folder icon, and then browse to the desired file (for example, filename.exe). | |
| Open web browser action |
|
Open | Web Browser - Open | Use this action to open a web browser at the specified URL and establish a session of where to correlate subsequent browser-related steps. Web browsers supported by this action are:
|
Examples
Example 1
This sample recording launches the Notepad application from the desktop, enters text in the Notepad text editor, saves the file as "new file.txt", and then exits Notepad.

-
The first step in the recording uses the Position interaction to move the mouse pointer to and double-click on the desktop shortcut icon for the Notepad application.
- The second step uses the Wait action to pause the recording until the Notepad application opens.
- The third step uses the Position interaction to move the mouse pointer to and single-click on the Notepad text editor window to apply focus to it.
- The forth step uses the Keyboard input action to enter "This is a sample sentence." in the Notepad text editor window.
- The fifth step uses the Control interaction to move the mouse pointer to and single-click on the Notepad's File menu.
- The sixth step uses the Control interaction to select the Save As command from the File menu.
- The seventh step uses the Wait action to pause the recording until the Save As dialog opens.
- The eight step uses the Control interaction to enter "new file.txt" in the File name box of the Save As dialog.
- The ninth step uses the Control interaction to move the mouse pointer to and then single-click on the Save button in the Save As dialog.
- The tenth step uses the Control interaction to move the mouse to and single-click on the Notepad's File menu.
- The eleventh and final step uses the Control interaction to select the Exit command from the File menu to close the Notepad application.
Example 2
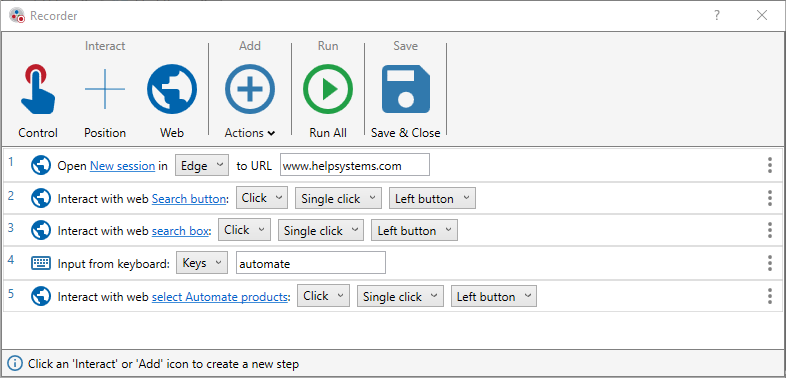
This sample recording launches the Edge web browser at www.helpsytems.com and then uses the website's Search button to navigate to the Automate Desktop product line page.
-
The first step in the recording uses the Web interaction to open the Edge browser to www.fortra.com.
-
The second step uses the Web interaction to click on the Search button (magnifying glass icon), located on the www.fortra.com home page.
-
The third step uses the Web interaction to apply focus to the search box.
-
The forth step uses the Keyboard input action to enter "automate" in the search box.
-
The fifth and final step uses the Web interaction to select the Automate Desktop product line from the list of search results.
Copyright © Fortra, LLC and its group of companies.
All trademarks and registered trademarks are the property of their respective owners.
24.2.0 | 202409100515 | September 2024