Interacting with Agents
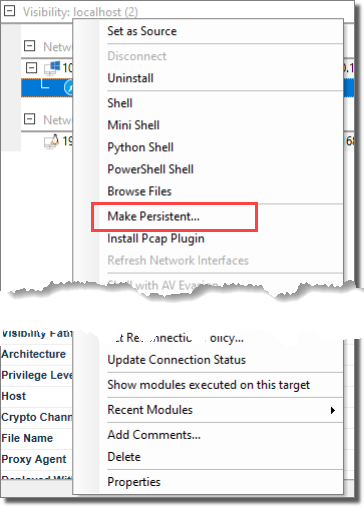
You can perform several functions by right-clicking on an agent and selecting from the context menu.
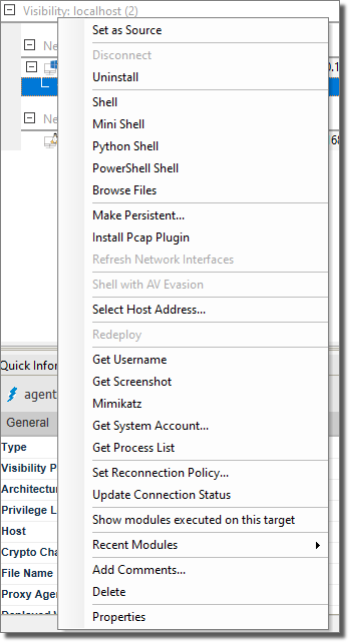
The menu may vary depending on the type of agent, its current status and other global settings:
- Set as Source: By default, the localagent is the source agent for all attacks. If a new agent is deployed on a host machine, you can set that agent as the source and all future attacks will be initiate from that agent. This process is referred to as pivoting. With a remote source agent, you can launch new Network and WebApps tests that might otherwise be less effective from the localagent. If, however, you want to simply run a module using a remote agent, click on that agent (focus on it) and then run the desired module. The module will automatically attempt to run using the focused agent.
- Uninstall: Allows you to uninstall a currently-connected agent.
- Connect: Allows you to reconnect with a persistent agent.
- Create Remote Interface (requires PCAP plugin for Windows be installed): With this operation, you can create a VPN connection with the targeted host. With this tunnel in place, you can then run applications (besides Core Impact) that are on your local system and have them interface with the host. For example, if you were able to - through other testing steps - learn the user's email username and password, you could set up your own email client to use their credentials, demonstrating a severe breach potential.
With this remote interface, once the VPN connection is in place, your system is equally visible to the host and the host network, making your testing more prone to detection. - Shell: Executes a fully functional terminal on the host.
- PowerShell Shell: Executes a fully functional PowerShell terminal on the host.
- Mini Shell: Implements a limited set of commands on the host.
- Python Shell: Executes a Python shell on the host.
- Browse Files: Allows file browsing on the host.
- Make Persistent: This option will install an agent in the filesystem of the compromised computer so that it can be used across system reboots for prolonged penetration tests.
- Install Pcap Plugin: Installs the Pcap plug-in on the selected agent to enable faster scanning and to add support for packet capture and packet injection to a remote pivoted agent.
- Shell with AV Evasion: Executes a shell via the agent. This shell contains antivirus evasion qualities that will reduce the chances that it will be detected by the host machine's AV processes.
- Recover: This option can recover the connection to a non-persistent agent that was disconnected unexpectedly.
- Set Reconnection Policy: Use this option to modify the Reconnection Policy for a specific agent - these settings override the global Reconnection Policy set in Agents Options.
- Update Connection Status: This option will gather performance statistics for a connected agent.
- Redeploy: Any agents that were previously active can be redeployed using this option. Core Impact will re-execute the exploits that were used to originally install the agent and, if successful, will re-active the agent.
- Get Username: If applicable, this action will execute the Get Current Username module and report back the current username in the Module Log tab of the Executed Modules pane.
- Get Screenshot: If applicable, this action will execute the Get Screenshot module and save a screen image of the host. The image will be visible in the Module Output tab of the Executed Modules pane.
- Mimikatz: If applicable, this action will execute the Mimikatz module and capture usernames and passwords on the host machine. Results will be shown in the Module Output tab of the Executed Modules pane.
- Recent Modules: This menu will show modules that you have recently executed so that you can easily repeat them for a selected agent.
- Add Comments...: Use the Add Comments... option to enter your own notes regarding the agent.
- Delete: Use this option to delete an agent from a host as well as from the entity view.
- Properties: This option will show properties of the agent in the Entity Properties pane.
The Shell
Agents can execute a fully functional terminal on the remote host. Select Shell from an agent's context menu to launch the Shell and you will have the ability to perform all functions that you could with cmd.exe on Windows or /bin/sh on a Unix system.
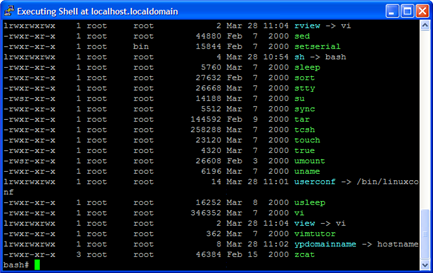
figure 54 - Running Info in a Shell
The Mini Shell
The Mini Shell uses a console-like interface to interact with an agent. Because the Mini Shell does not require the presence or availability of a shell in the remote host, it implements only a limited set of commands. One of the major benefits of using the mini shell is that it hides shell-like functionality from host intrusion detection systems that may trigger an alert when a shell command is executed. The mini-shell also allows you to transfer files between the agent and your local computer, something the Shell does not permit. Select Mini Shell from an agent's context menu to launch the Mini Shell. Type help to get a list of valid Mini Shell commands.
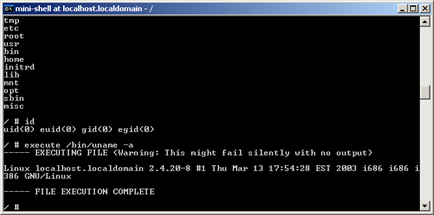
figure 55 - Running Commands in a Mini Shell
The Python Shell
In order to interface with the agent using a fully functional Python Shell, right-click on the agent and select Python Shell from the context menu. This shell will accept any valid python commands.
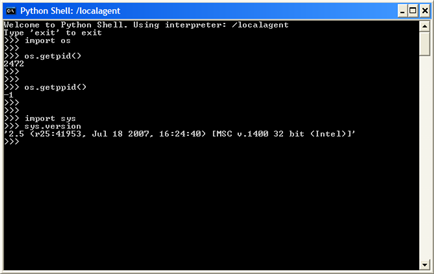
figure 56 - Python Shell
The File Browser
You can use the File Browser to browse files in the host where the agent is running. Files and complete folders can be uploaded to or downloaded from the target host's file system. To access the File Browser, right-click on the desired agent and select Browse Files from the context menu.
Using the File Browser toolbar  , you can view/open a file, download or upload a file, or even delete a file in the remote system.
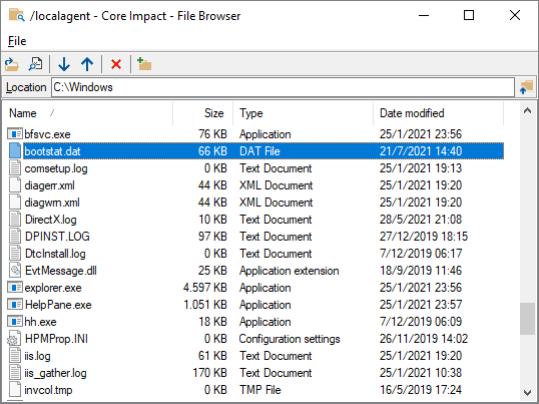
figure 57 - Browsing Files on an Agent
Setting Source Agents
When you run a module (see Running Modules) the Console automatically runs the module from the point of view of the agent that is currently set as the source agent. You can tell which agent is currently the source agent because it will be marked with boldface in the Entity View Panel of the Console.
You can make any agent the source agent at any time by right clicking on the agent in the Entity View and selecting the option from the context menu. Note that the agent needs to be in the "connected" state to be eligible for source agent status.
To return to the default setting of localagent as source agent, right click on localagent and select Set as Source or click on the Set localagent as source button ( ) on the Entity View toolbar.
Remote Network Interface
Once an agent has been Set as Source, you can create a VPN connection with the targeted host. With this tunnel in place, you can then run applications (besides Core Impact) that are on your local system and have them interface with the host. For example, if you were able to - through other testing steps - learn the target user's email username and password, you could set up your own email client to use their credentials and access their mail servers, demonstrating a severe breach potential.
To set up this tunnel, set the agent as source as described in the previous section, then drag-and-drop the module Remote Network Interface onto the agent.
With this remote interface, once the VPN connection is in place, your system is equally visible to the host and the host network, making your testing more prone to detection.
Agent States
Agents exist in one of three states. The following table describes these agent states and shows the icon that represents each in the Entity View Panel of Core Impact's Console.
Agent States
| Icon | State | Description |
|---|---|---|

|
Deployed but Disconnected | The agent has been successfully deployed in the remote system but it is not connected to the console. |

|
Deployed and Connected | An active communication channel exists between the console and the remote agent. |

|
Uninstalled | The agent has been removed from the remote system and is no longer active. |

|
Privileged Connection | An active communication channel exists between the console and the remote agent with Admin rights. |

|
Broken Link | A persistent agent that is currently disconnected but has a Reconnection policy set. |
Making Agents Persistent
By default, agents are deployed in memory only and will not survive if the host system is rebooted. To prevent this, you can make an agent Persistent which will cause the agent to increase its presence on its host machine by creating a service and establishing itself in the host's file system. If you wish to configure an agent to be Persistent:
-
Right-click on the agent in the Entity View and select Make Persistent (An alternate method is to run the "Make agent persistent" module in the Agents module folder against the desired agent in the Entity View).
-
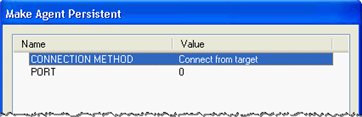
In the parameters window, select the connection method.
- Connect from target: A new TCP connection will be created originating from the remote agent on the target host back to the host where the current source agent is located. The Reconnection Policy that is set in Agents Options will determine the frequency and duration of the attempted reconnection.
- Connect to target: A new TCP connection will be created originating from the host where the source agent is located, terminating at the remote agent on the target host.
- HTTP Channel
- HTTPS Channel
Also select the PORT number. If you leave the port at 0, the connection will occur over the agent's original connection port.
- Press the OK button.
A new agent will be created, representing the Persistent Agent.
This process requires that the remote agent has administrator privileges.
After an agent is made persistent, you will be able to reconnect it to its rebooted target host. To do this, after the host is rebooted:
- Right click on the agent.
- Select Disconnect.
- Right click on the agent again.
- Select Connect.
The agent will reconnect to the rebooted target host.
Connecting Agents
To connect a persistent agent that is in the unconnected state, right click on the agent in the Entity View Panel and select . Because connecting an agent can be a complex technical task, the Console uses a built-in module called Agent Connect to connect to the agent.
You can view the status of the Agent Connect Module in the Executed Module Info Panel just as you can with any other executed module. Check the Module Log to see if an error occurred in the module's execution (refer to the section called “Analyzing Module Output” for information on how to consult module status and output).
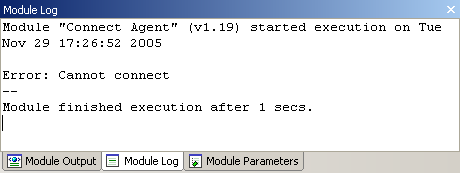
figure 58 - Agent Connect Module - Module Log Panel Displaying Error Text
Uninstalling Agents
You can uninstall a connected agent from the remote system by right clicking the agent in the Entity View Panel and choosing the command from the context menu.
Once you uninstall an agent, it is no longer available to you. However, the agent's entity remains in the database for logging and reporting purposes. You can remove it by right clicking over on the agent and selecting . Note that if you choose to remove an agent in this manner, it will not be included in future reports.
Issuing a disconnect command to an in-memory agent (the default agent) effectively uninstalls that agent. Disconnecting from a persistent agent leaves the agent on the filesystem and allows you to reconnect to it at a later time. Deleting an agent removes it from the database, but it doesn't perform an uninstall on the target machine. Always uninstall before deleting an agent.
SQL, XSS and PHP Agents represent knowledge of how to exploit a vulnerability on a web page, they do not represent running code on the page/application. Therefore there is no need (or ability) to uninstall a WebApps Agent.
IPv4 and IPv6
Core Impact supports agent communication over both IPv4 and IPv6. In situations where you would like to launch modules that do not have a target specified, you might want to set your localagent to use a IPv6 address. For example, if you launch the Web Server module, and you want the server to listen on an IPv6 address, you would first want to follow the below steps to change your localagent from IPv4 (the default) to an IPv6 address. Follow these steps in the Network View of the entity database:
- Right-click on the localagent. This is the item to which installed agents communicate back to in Core Impact.
- From the right-click menu, click Select Host Address...
- Click inside of the Value field where the current host IP address is listed (by default, this will be an IPv4 address) and click the ellipsis button (
 ) to the right of the host address.
 - Check the box next to the IPv6 (link-local) address for your network adapter.
- Click the OK buttons until you've returned to the Core Impact workspace.
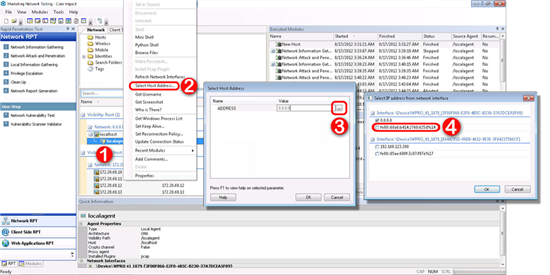
figure 59 - Switch to IPv6
Any agents deployed after making this change will communicate back to the localagent using the address you specified (either IPv4 or IPv6).