Defining a Proxy
If you connect to EFT through a proxy server, you must enable and define the proxy. The Proxy Settings dialog box appears in the Connection Profile, File Offload configuration (Copy/Move Action), File Download configuration (Download Action), and the Invoke Web Service from URL Actions.
-
Using the DMZ Gateway as a proxy is not available when using Cloud Connection profiles. EFT uses the AWS SDK, which does not support the SOCKS protocol, which is required to proxy communications via the DMZ Gateway.
-
Contact your system administrator for the proper host name, port, user name, password, and proxy type, as well as any required advanced authentication methods.
To configure the proxy settings
-
In the profile or action that you are configuring, click Proxy.
-
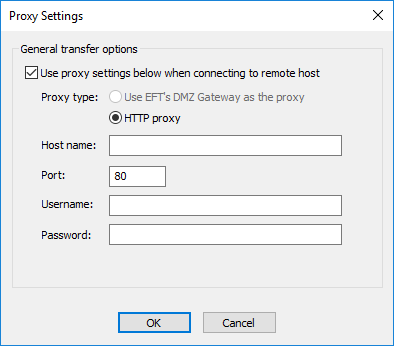
Select the Use proxy settings check box.
-
Specify the Proxy type.
-
Specify the Host name, Port, Username, and Password used to access the proxy server.
-
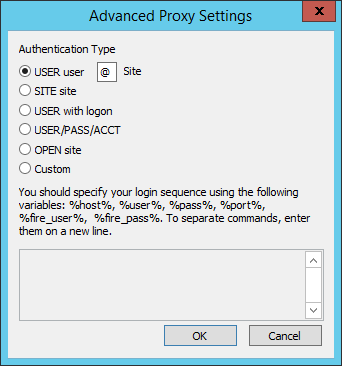
Click Advanced to specify an authentication type or login sequence. You must have selected FTP Proxy in the Proxy Settings dialog box to specify advanced settings.
-
USER user@site if your proxy server requires the USER command followed by your user name and the Site name to allow connection with a remote Site. You can change the @ symbol if a different separator is required by your proxy server.
-
SITE site if your proxy server requires the SITE command followed by the address of the remote FTP site to allow a connection.
-
USER with logon if your proxy server requires the USER command followed by a user name and password to allow connection with a remote Site.
-
USER/PASS/ACCT if your proxy server requires all three commands before allowing a connection to a remote Site.
-
OPEN site if your proxy server requires the OPEN command followed by the Site name before allowing connection to the Site.
-
Custom if your proxy server requires a login sequence different from those above. Refer to the procedure below for details of creating a custom authentication method (login sequence).
-
In the Advanced Proxy Settings dialog box, click Custom, then specify the login sequence in the text box using the following variables: %host%, % user%, %pass%, %port%, %fire_pass%, %fire_user%. Be sure to type each variable with percent signs before and after, and press ENTER to separate commands.
-
Type any other commands and variables, separating commands with a line break (press ENTER).
-
Click OK to accept the changes and close the Advanced Proxy Settings dialog box.
-
Click OK to accept the changes and close the Advanced Proxy Settings dialog box.
-
Click OK to accept the changes and close the Proxy Settings dialog box.
Specify one of the following Authentication Types:
To create a custom authentication method for a proxy server