Business Window Dashboard Widget
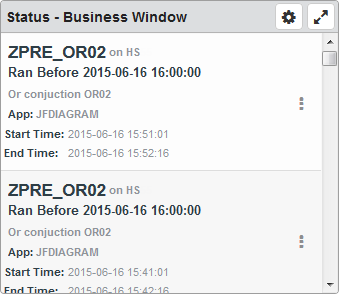
For the selected system or critical job list, this widget allows you to set a window of time during which you'd expect certain jobs to normally run. It then shows you any anomalies, such as jobs that didn't run, or jobs that ran outside of (before or after) the business window you set. This can help you monitor whether or not you're meeting the terms in your SLAs. With this information, you can identify problem areas and fix them.
Things you can do:
- ClickTap
 Maximize to view the widget full-screen. ClickTap
  to view it on the dashboard again.
 - Select Widget Type of Key Indicator or List.
- Sort displayed Column order on List Widget Type.
- Set Auto Refresh to custom setting.
- ClickTap
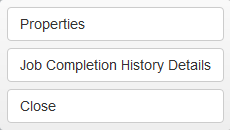
 Show Actions, then clicktap an option to complete that action or access that page. Note: The image below is a sample. That available options depend upon the job's type. For details on the options, see the job Completion History page.
To change the settings:
-
ClickTap
 Settings on the widget.
 -
Type a new Name, if necessary.
-
ClickTap Reset Name to have the software create a name based on the widget and the settings you've selected.
Note: If you're using the system-generated name, be sure to click Reset Name before saving so that a new name can be generated, if needed.
-
Select the display Size of the widget on the dashboard. This affects the height of the widget.
-
ClickTap the Auto-Refresh button to enable it (Yes) or disable it (No).
-
Type the number of minutes between each Auto-Refresh (Min).
-
Select an option under Sort By to indicate which data to use for sorting, and whether to sort it in
 ascending or
  descending order.
 -
Select a Time Range for the data you want displayed on the dashboard.
-
Enter the Start Time and End Time for the business window on the days you chose in the previous step. Use 24-hour (military) time, in the format hh:mm:ss. Either type the time you want, or clicktap
 Clock to select it.
You can have a business window that spans two days; for example, from 21:00:00 on one day to 02:59:59 on the next day. However, you cannot have a window longer than 24 hours.
-
Select the Systems to display.
If you choose Selected System or Critical Job List, clicktap Look Up to select the one you want.
Note: For information on selecting the default system for Robot Schedule, see Select System.
-
ClickTap Save.
Note:ClickTap Delete to delete this widget from the dashboard.