Working with Alerts
Software occasionally encounters a condition that it cannot handle fully, or a condition that is handled by a deviation from normal processing. In such occasions, a way to notify the administrator of the resulting condition is needed. In Powertech Central Administration, these notifications are called Alerts.
An Alert is useful, for example, when a *USRPRF object cannot be created on an Endpoint system during Onboarding. In such a case, an Alert informs the administrator(s) that someone ought to make sure the *USRPRF actually gets created on that system.
Often, these problems result in a failed event. These failed events are informative if you can find them among the large amount of other data in the Incomplete Events UI, a task that can be impractical. Alerts consolidate notifications of various conditions, making them convenient to access.
Alerts are textual in nature, much the same as History information. Alerts are classified so as to indicate their failure point or reason for being. Profile Deletion and Profile Creation are examples of Alerts classes. (Each module invents its own Alert class—there is not a static list of them.)
Alerts are created by Powertech Central Administration and are typically acknowledged (marked as "handled") by human administrators. Alerts can also be acknowledged by the software on behalf of the administrator after a specified time period has elapsed; this time period is measured in 24-hour periods, not "calendar days" or "business days." This auto-acknowledgement process occurs continually throughout the day as long as the event monitors for each module are running.
Viewing and Managing Alerts
Alerts can be displayed using the F21 key on any menu in Central Administration or Identity Manager.
An Alert Lamp indicator displays in the upper-right corner of each menu if one or more Alerts exist that may interest you. The indicator reads "ALERTS" in red.
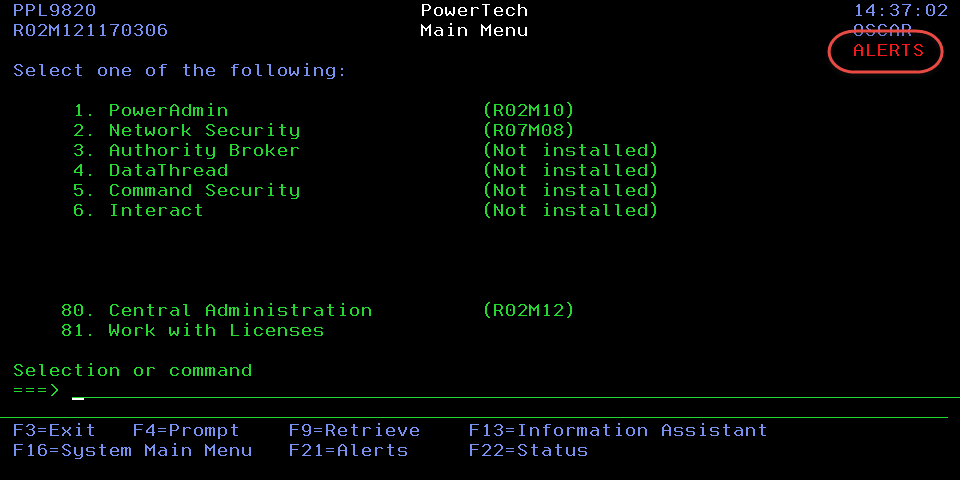
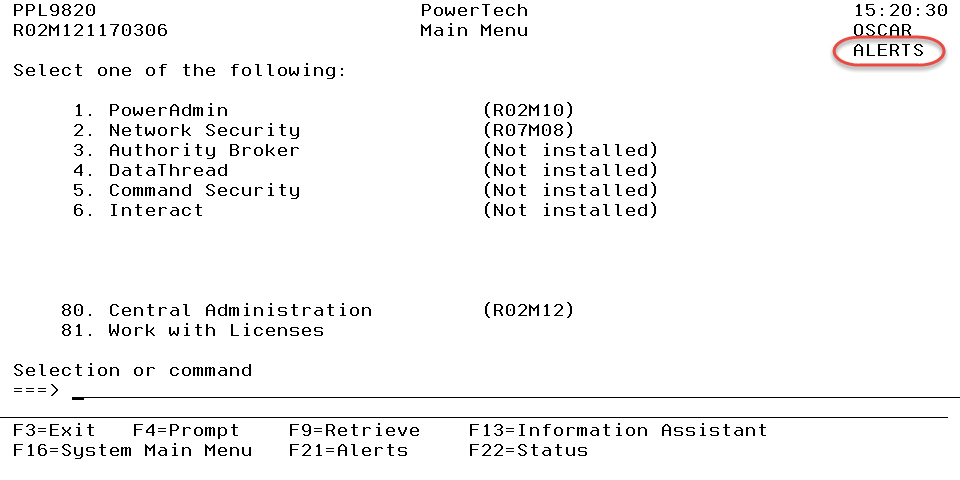
Your interest in Alerts may differ from that of other administrators; for this reason, Powertech Central Administration allows you to tailor and indicate what constitutes "interesting" by way of a subsetter just like the one supported by the Alerts list panel. The Alert Lamp indicator is turned on whenever any Alerts exist that are delivered by an Alert subsetter. This is the same subsetter used on the Alert list, and is set up the same way.
- Press F21 on any menu in Central Administration to see Alerts. The Alerts panel appears.
- Choose 2 to acknowledge the alert. Acknowledged means that the underlying condition has been "handled" and this Alert may be purged when appropriate.
- Choose 4 to Purge an Alert immediately. The Alert must be acknowledged in order for the purge to be successful.
- Choose 5 to view the Alert Content panel, with more information, including:
- A short description from the Alert.
- The source Module and date/time the Alert was generated.
- The Alert Class and the Status (OPN or ACK).
Alert Class Controls
To specify how automated processes treat an Alert:
- From the Central Administration Main Menu, choose 7, to open the Alert Class Controls panel, then choose 2 for an Alert Class.
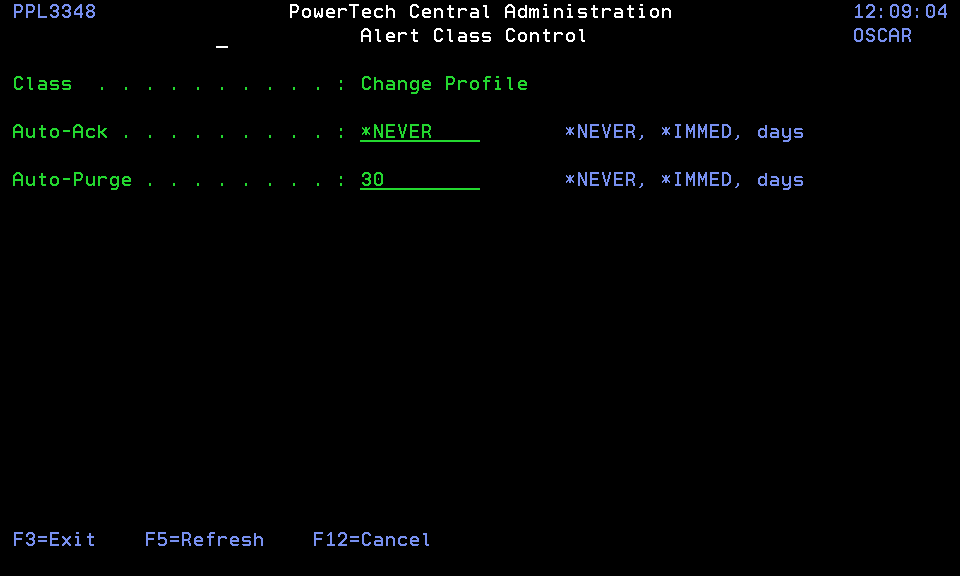
- Use these available options to modify some settings that control the handling of any Alert of the same class.
- Auto-Ack
- Auto-Ack controls when the Alert is automatically acknowledged. Valid values are:
- *NEVER (default) This Alert Class will never be automatically acknowledged.
- *IMMED The Alert is acknowledged automatically when created.
- [A number of days] When the Alert has existed for this many days, and is still in the "open" status, its status will be set to acknowledged.
- Auto-Ack controls when the Alert is automatically acknowledged. Valid values are:
- Auto-Purge
- Auto-Purge controls what action will be taken after the Alert is acknowledged. This action will occur regardless of whether the acknowledgment was performed automatically by the software or manually by the administrator. Valid values are:
- *NEVER The Alert is kept in the acknowledged status forever.
- *IMMED The Alert is purged immediately upon being acknowledged
- [A number of days] The Alert is kept a number of days and then purged.
- Auto-Purge controls what action will be taken after the Alert is acknowledged. This action will occur regardless of whether the acknowledgment was performed automatically by the software or manually by the administrator. Valid values are:
- Auto-Ack
 History Browser