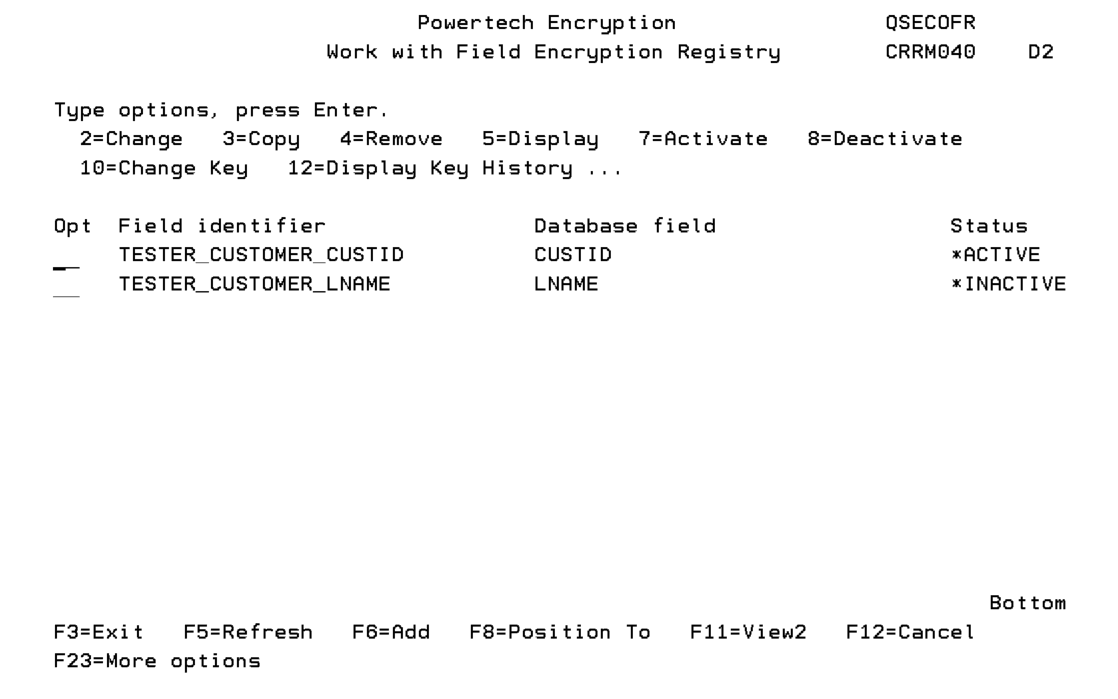
Work with Field Encryption Registry (WRKFLDENC)
The WRKFLDENC command allows authorized users to work with the entries in the Field Encryption Registry. This command’s screen includes functions to add, change, activate, deactivate and remove field entries.
How to Get There
From the Field Encryption Menu, choose option 1, Work with Field Encryption (WRKFLDENC). Or, execute the command CRYPTO/WRKFLDENC.
For each field entry listed, the WRKFLDENC screen shows the user-assigned field identifier, the actual database field name and the status. Press F11 to view more information about each entry.
Status Codes
*ACTIVE
The field entry is activated for encryption.
*INACTIVE
The field entry is not activated for encryption.
*PROCESS
The field entry is currently being processed for activation or deactivation.
*ERROR
The activation or deactivation process failed and requires Fortra support.
Options
For each entry listed on the screen, you can utilize one of the following options.
2=Change
Displays the Change Field Encryption Entry (CHGFLDENC) panel, where you can change the field entry using the CHGFLDENC command.
3=Copy
Displays the Copy Field Encryption Entry (CPYFLDENC) panel, where you can copy the field entry using the CPYFLDENC command.
4=Remove
Displays a prompt to confirm the removal of the field entry using the RMVFLDENC command.
5=Display
Displays the Display Field Encryption Entry (DSPFLDENC) panel, which shows the values for the field entry using the DSPFLDENC command.
7=Activate
Displays a prompt to activate the field entry for encryption using the ACTFLDENC command.
8=Deactivate
Displays a prompt to deactivate the field entry from encryption using the DCTFLDENC command.
10=Change Key
Displays the Change Field Encryption Key (CHGFLDKEY) panel, which allows you to change the field entry’s encryption/decryption keys using the CHGFLDKEY command.
12=Display Key History
Displays the history of the Keys (used to encrypt/decrypt the field entry values) using the WRKFLDKEY command.
14=Edit Full Auth List
Displays the Edit Authorization List command for Authorization List for the Full Value.
15=Edit Mask Auth List
Displays the Edit Authorization List command for Authorization List for the Masked Value.
16=Change Field Mask
Displays the Change Field Mask (CHGFLDMSK) panel, where you can change the field mask using the CHGFLDMSK command.
17=Change Field Auth. Lists
Displays the Change Field Authorization Lists (CHGFLDAUTL) panel, where you can change the field Authority lists using the CHGFLDAUTL command.
18=Add Pending Key
Displays the Add a Field Encryption Pending Key (ADDPNDKEY) panel, where you can add a pending key using the ADDPNDKEY command.
19=Change Pending Key
Displays the Change a Field Encryption Pending Key (CHGPNDKEY) panel, where you can change a pending key using the CHGPNDKEY command.
20=Remove Pending Key
Displays a prompt to allow you to remove a pending key using the RMVPNDKEY command.
21=Display Pending Key
Displays a prompt to allow you to display a pending key using the DSPPNDKEY command.
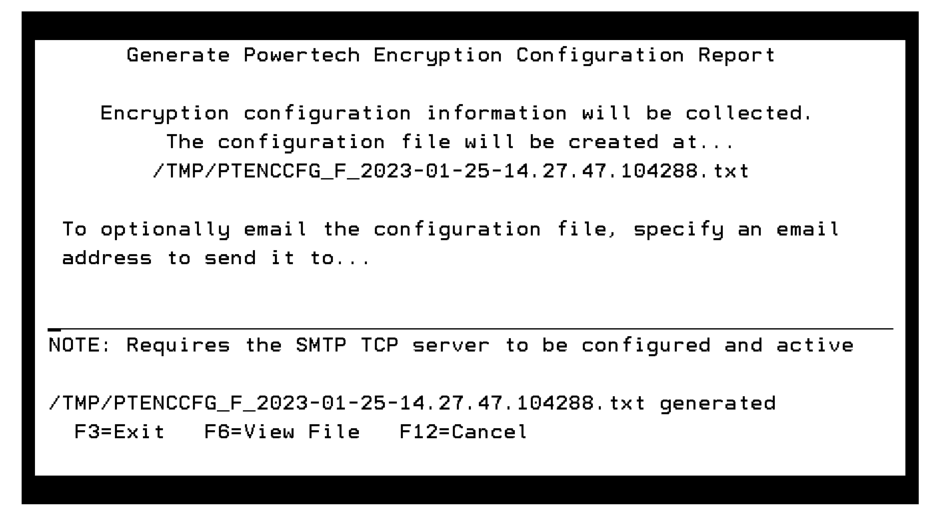
22=Generate Config Report
Displays a message detailing the location of where the encryption configuration file will be created. You can also enter a valid email address to where the configuration report can be sent. Note that this option requires the SMTP TCP server to be both configured and active.
Press Enter to generate the report.
Function Keys
F3 (Exit): Exits the WRKFLDENC screen.
F5 (Refresh): Refreshes the list of field entries in the Registry.
F6 (Add): Opens the Add Field Encryption Entry (ADDFLDENC) panel, where you can add a new field entry in the Registry (using the ADDFLDENC command).
F8 (Position To): Displays filters to select the list entries on the screen.
F11 (View2): Additionally shows the field entry’s database file name, external storage setting and trigger setting.
F12 (Cancel): Cancel the current screen and go to the previous screen.
F23 (More options): Show more options.