Managing Remote Tasks
Overview
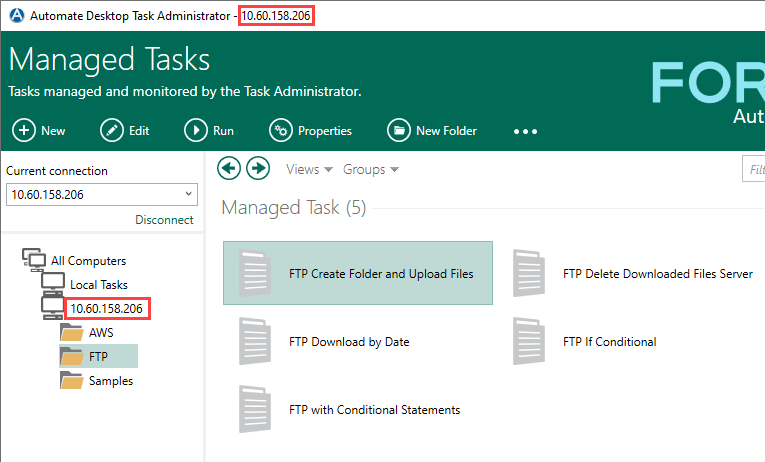
When a connection is established to one or more remote Automate Desktop clients, a new computer icon corresponding to the remote connection will appear in the Task Folders pane and folders present on the remote machine will appear directly under the computer icon. You can switch back and forth from the local Automate Desktop client and various remote clients by simply clicking the corresponding computer or folder icon on the Task Folders pane. For more details regarding remote connection, see Establishing a Remote Connection.
Creating & editing remote tasks
When creating a task remotely or modifying steps of a remote task, the Task Builder that appears on the screen is relative to that of the local computer. Because of this, certain actions/activities or triggers may not function properly unless their settings are modified to reflect file locations and/or system properties relative to the computer that the task will eventually trigger/run on. For instance, the General properties of the Copy File activity contains a Source and Destination parameter which requires a drive location to be entered for both the source and destination file. Clicking the Folder icon next to the Source or Destination parameter will open a standard Explorer window that displays files and folders of the LOCAL drive and not the remote drive. Therefore, to specify a drive location relative to the remote computer, the developer must know the location ahead of time and enter the information manually on the provided text-box. See Tasks for more details.
Starting remote tasks manually
Automate Desktop installations are mutually exclusive. In other words, an Automate Desktop task service installed remotely does not rely on the local task service or other remote task services to execute a task. When connected to a remote client, a user can add, remove or modify properties of a managed task, enable/disable triggering and run tasks remotely. However, once a task is sent to another computer, there is no interaction that takes place between the remote and local Automate Desktop client when the task launches.
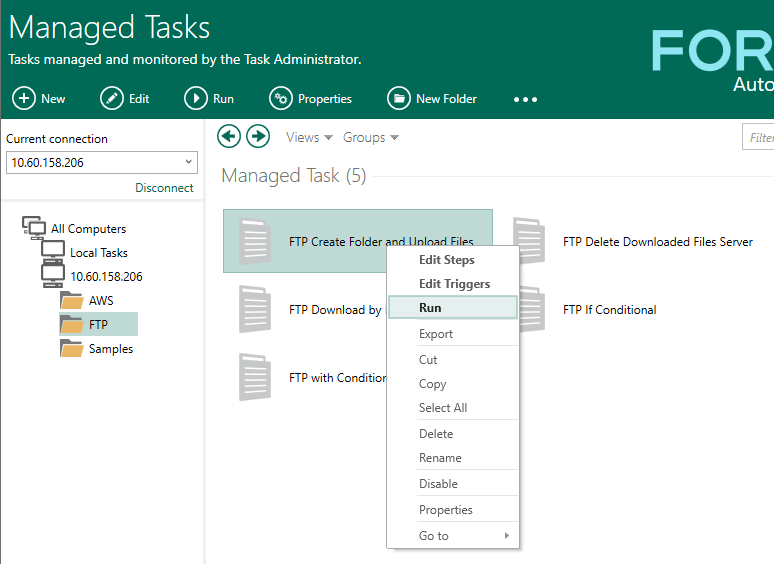
When working with remote tasks, keep in mind that what appears on the Task Administrator is relative to the remote client. Therefore, if a remote task is executed manually from the local Task Administrator (by selecting a remote task's icon, and then selecting Run, or right-clicking the task's icon and then selecting Run), the task will run on the remote computer and not locally. The user will, however, still receive completion, failure and error notifications locally in the Messages output (bottom right) pane of the local Task Administrator. For more details regarding manually running and controlling a managed task, see Running Tasks Manually.
Viewing remote task properties
When viewing the properties of a remote task that indicate a drive location, the data that appears on the Managed Task Properties dialog for that task is relative to the remote machine. For example, when viewing the properties of a remote task named My Remote Task, the General tab properties may indicate that the physical location of the task is C:\ProgramData\Automate Desktop 2024\Tasks.
This is actually pointing to the remote machine's C:\ drive, and not that of the local machine. However, when clicking the Location button in order to specify a different drive location, the Explorer window that comes into view reflects the local machine's drive instead. So, to specify a path relative to the remote machine, it must be entered manually. See About Managed Task Properties for more details.
Controlling remote tasks
Tasks that are running or queued on a remote machine can be viewed and/or
controlled from the local Task Administrator.
Organizing remote tasks
Once connected to a remote Automate Desktop client (whether it is a Runtime component or full version), the process of organizing tasks and folders located on a remote machine is identical to organizing local tasks and folders. A user can create new remote folders and nest folders one inside another. When creating a new remote task, it will be placed in the folder that currently appears in the main viewing area of the Task Administrator. . Other procedures include deleting or renaming remote folders/tasks or copying/moving folders or tasks from one folder to another. See Managing & Organizing Tasks for more details.
Sharing tasks between computers
Once you have a connection to one or more remote machines, you can share tasks among them by copying or moving the tasks from one machine to another. You can copy or move tasks or folders from any connected machine to any other connected machine. You can also use the Deploy feature to run local tasks on remote machines.
To copy a task or folder
-
In the Task Folders pane, select the computer or folder that contains what you want to copy.
-
In the right pane, select the task or folder to copy.
-
On the Edit menu, click Copy.
-
In the Task Folders pane, select the computer or folder where you want to place the copied task or folder.
-
On the Edit menu, click Paste.
To move a task or folder
-
In the Task Folders pane, select the computer or folder that contains what you want to move.
-
In the right pane, select the task or folder to move, and then drag it to a folder or machine in the Task Folders pane.