Creating a User Account
This topic shows you how to create a user account. Each user needs a user account to log in to Webdocs. Later, you can choose how users in groups can work with documents.
To create a user account:
-
On the side menu of the Settings tab, click Users
 .
. -
Press the New User
 button.
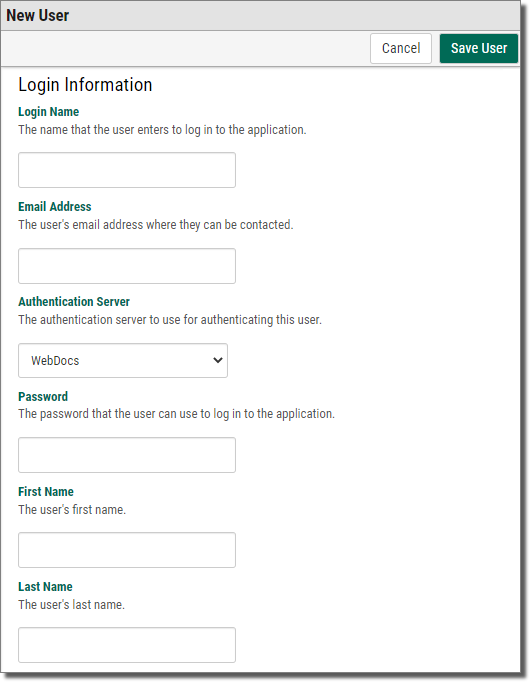
 The New User page displays.
-
 Fill the new user's information based on the following:
Login Name - A log-in name for the user.
Email Address - The user's email address.
Authentication Server - The authentication server to use for authenticating this user.
Password - A password for the user. The password is case-sensitive.
First Name - The user's first name.
Last Name - The user's last name.
-
Click the field to display the calendar.
-
Scroll to the month and year.
-
Click the day that you want this user account to expire.
NOTE:An expired user account still exists in Webdocs, but the user cannot log in until an administrator refreshes the expired account.
Copy User Group Memberships - If you want to copy another user's group memberships, click the box and choose the user to copy.
NOTE:Giving this user the same group memberships as another user is a quick way to assign permissions.
Assign User Group Rights - If you have already set up groups, choose one or more groups to add the user to.
NOTE:All new users are automatically added to the Default Group.
Phone Number,Title,Company, and Description - (Optional) Additional information that can be helpful if you need to contact the user.
Default Document TypeandDefault Folder - (Optional) The default Document Type and folder, if this user will usually only check in documents to one Document Type or one folder.
NOTE:This default will be available from any check-in interface: Webdocs, RJS Imaging Scan Workstation, Webdocs Tray Capture, and so on.
Enterprise Workflow Login Information and WebForms Login Information - The log-in information for Enterprise Workflow and WebForms, if you are integrating with either of those applications. For more information, see Configuring the Integration Settings.
-
-
At the bottom of the page, click Save User
 .
.A message displays, telling you the user account is created.
