Start the Server Setup wizard. If no servers are defined, the Server Setup wizard Welcome page appears automatically after you log in to EFT Administrator; otherwise, on the main menu click File > Add New EFT Server and log in using the Server login credentials you created when you installed the Server.
Read the introduction on the Welcome
page, then click Next. The Remote Administration page appears.
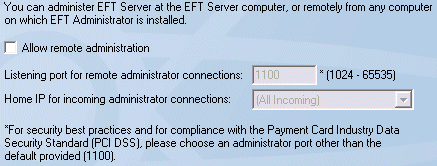
If you do not want to allow remote administration, clear the check box, then skip to step 5.
If you want to allow remote administration, select the check box and specify the administration port and Home IP address (or All Incoming).
Click Next.
If you chose remote administration, the Require
Secure Admin Login page appears.

To enable secure remote administration, select the Use SSL for secure remote administration check box, then click Next. The SSL Certificate Options page appears.
-
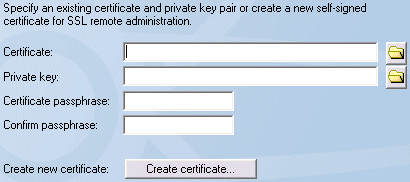
In the Certificate and Private Key boxes, click the open icon
 to browse for the private key pair files, or click Create
certificate to create one. See SSL
Certificate-Based Login, Creating
Certificates, Importing
a Certificate into the Trusted Certificate Database, and Importing
Certificates from Microsoft IIS 5 for information regarding certificates.
If you do not enable SSL, you will not be able to connect to EFT Server from a remote EFT Administrator.
Click Next.
The Limit Remote Administrator IP Addresses
page appears.
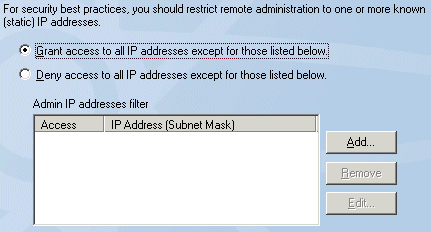
Specify whether to Deny access to all remote IP addresses except for those you specify, or Grant access to all remote IP addresses except for those you specify, then add the IP addresses exceptions to the list.
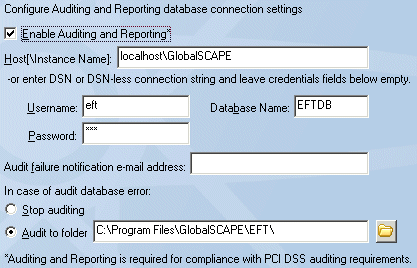
If you are using Auditing and Reporting, select the Enable Auditing and Reporting check box, then provide the information required to connect to the ARM database as described below. Otherwise, skip to the next step.
-
In the Host[\Instance Name] box, type the Server name or IP address.

If you are using SQL Server as the Auditing Database, \InstanceName corresponds to SQL Server's notion of named instances, a feature that allows a given computer to run multiple instances of the SQL Server Database Service. For more information, please see http://msdn2.microsoft.com/en-us/library/ms165614.aspx.
In the Username and Password boxes, type the username and password used to connect to the database (not the EFT Server credentials).
In the Database Name box, type the name of the database.
In the Audit failure notification e-mail address box, type the e-mail address to which EFT Server is to send database connection error notifications. You can add as many e-mail addresses as needed; separate the addresses with a comma or semicolon. EFT Server uses its global SMTP e-mail settings from the SMTP Configuration to send the e-mails. You will configure those settings on the next page.
In the In case of database error area, specify an action for EFT Server to take if there is an error with the database. To stop recording data, select Stop auditing. To continue recording data to a file, select Audit to folder, and specify the location for the log file.
|
|
UNC paths are supported. The GlobalSCAPE EFT Server service must run on a computer that has access to the network share, and the full UNC path must be used, that is: \\xcvd.forest.intranet.xc\Common_Files, not G:\Common. |
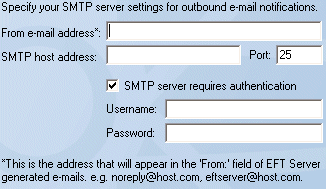
In the From e-mail address box, specify the e-mail address for e-mail notifications (such as those triggered by Event Rules).
In the SMTP host address boxes, specify the SMTP server host address and port.
If the SMTP server requires authorization, select the check box and provide the Username and Password.
Click Next. Server Setup is complete; you are offered the option of continuing to the Site Setup wizard, or quitting the wizard, saving EFT Server settings, and configuring the Site(s) later. You must configure at least one Site to service inbound connections to EFT Server.
Click an option, then click Finish. If you chose Run the Site Setup wizard now, the Site Setup wizard Welcome page appears.
