After you add all the devices to the map, you can arrange them to suit your ideas about the network.
Default Appearance of Devices and Networks
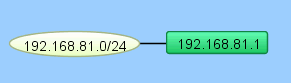
By default, Intermapper displays devices as rectangles in its map. These devices are connected by links (straight lines of differing thickness to indicate the kind of link) to networks, which are represented as ovals.
Possible Arrangement Approaches
You can use Intermapper's layout tools to arrange your maps in ways that are most useful to you.
- Find one or more clusters of related items and move them close together.
-
After you create clusters, you can move them to different parts of the map.
For example, an Ethernet or FDDI backbone with its attached routers might make a good cluster. Similarly, a central router or switch with its attached networks might serve as a cluster.
-
If networks or ports are not important for a map, you can hide them from the Interfaces Window.
See Using the Arrange Commands for more information about using the commands from the Format menu.
For other information related to arranging your maps, see Arranging Tips.
Enhancing Your Map's Appearance
Intermapper has many tools for enhancing your map's appearance. These include the following:
- Setting Custom Icons:Intermapper comes with a set of icons derived from Cisco's Icon Library. Use these industry standard icons, or import your own PNG, GIF, or JPEG images. For more information, see Custom Icons.
- Setting a Map Background: You can use a graphic as a "background" to the map. The devices being monitored will appear above this background image. For more information on using background images, see Background Images.
- Adding text objects: You can add text objects your map to label groups of objects or provide information to the viewer. For more information, see Text in the Insert menu reference topic.
- Importing Device Descriptions: Intermapper allows you to import descriptions of the devices on a map directly from a tab-delimited file. This simplifies the creation of a new map, and makes it easy to add new devices as your network grows. For more information, see Importing Data Into Maps.
- Setting the Geographic Coordinates of the Map: Intermapper allows you to indicate the latitude and longitude for benchmarks (known positions on the map). If, for example, you are using an actual geographic map as a background image, you can use geographic coordinates to place a device in the correct location on the map. For more information, see Using Geographic Coordinates.
Setting a Map Background
Create a new map and save it. You can scan your own map or obtain an image that covers the right area from one of the sites listed in Using Geographic Coordinates. Intermapper can use PNG, GIF, or JPEG image files as map backgrounds. You can obtain suitable images by scanning or creating your own maps, or use one of the many map sites listed in Sources of Maps.
To add a background image to a map, drag the image file into the map window. It is added to the map and becomes visible.
Setting the Geographic Coordinates of a Map
If you use a geographic map for a background, you can associate specific points on the map with geographic coordinates (latitude and longitude) by adding benchmarks. For more information, see Using Geographic Coordinates. After you specify the coordinates, you can specify geographic coordinates for devices as you import them to the map and they are automatically placed in the correct location.