Monitor Menu
You can use the Monitor menu to re-probe one or more devices on a map, to edit information about one or more devices, and to open various windows related to map items. The Monitor menu is available only from a Map window.
| Menu Command | Description |
|---|---|
| Reprobe/Reprobe Selection |
Reprobe: If no device is selected, re-polls all devices on the map. Reprobe Selection: Re-polls the selected devices. |
| Acknowledge | Use this command to acknowledge a failure. This stops an icon's flashing and deactivates recurring notifications. |
| Un-Acknowledge | Use this command to remove an acknowledgment from the selected device, and to reactivate notifications. |
| Info Window | Opens the Info Window for the selected device or network. |
| Status Window | Opens the Status window for the selected device, network, or link. |
| Interfaces > Window | Opens the Interfaces window for the selected device. |
| Interfaces > Error Thresholds | Opens the Error Thresholds dialog. Sets error thresholds for one or more interfaces. |
| Interfaces > Utilization Thresholds | Opens the Utilization Thresholds dialog. Sets thresholds for utilization of one or more links. |
| Interfaces > Discard Thresholds | Opens the Discard Thresholds dialog. Sets packet discard thresholds for an interface. |
| Interfaces > Behavior | Opens a device's Behavior dialog. Specifies whether to allow periodic reprobes and whether to display unnumbered interfaces. |
| Device Notifiers Window | Opens the Device Notifiers window and shows a list of notifiers for the selected device. |
| SNMPWalk | Opens the SNMPWalk dialog. |
| Flows Window | Opens the Flows Window if Intermapper Flows is running. |
| Show in Layer 2 (Pg. 1) | Opens the Device List window in Layer 2 view and shows connections to the selected device. |
| Reports | Opens the Reports window in your browser. |
| Set Info > Set Address | Sets the IP address or name for the selected device. |
| Set Info > Set Comment | Allows you to enter a comment about the selected device(s). |
| Set Info > Set Community | Sets the SNMP community string for the selected devices. |
| Set Info > Set Data Retention | Selects a Data Retention policy to use when storing data to the Intermapper Database. |
| Set Info > Set Double-click (submenu) | Defines the action to be taken when you double-click the selected device. |
| Set Info > Set Kind... | Sets the device kind you want to use when storing data to the Intermapper Database. |
| Set Info > Set Latitude & Longitude | Sets the latitude and longitude for the selected devices. |
| Set Poll Interval | Sets the poll interval for the selected devices. |
| Set Info > Set Probe (Pg. 1) | Sets the probe to be used with the selected devices. |
| Set Info > Set Thresholds | Sets the criteria for sending notifications that a device is down, in alarm, or in warning. These settings apply to all devices on the map. |
| Set Info > Set Vantage Point | Sets the selected device as the vantage point from which Intermapper views all other devices on the map. |
| Reset Short-term Packet Loss | Resets the accumulated value of short-term packet loss. |
| Helper Apps (submenu) | Launches a helper application or customize the list of applications. |
Reprobe/Reprobe Selection
Re-polls the selected devices to retrieve the status of a device or detecting that it has returned to service.
- If a single device is selected, it is polled again as soon as possible.
- If multiple devices are selected, they are moved to the head of the poll queue so they are re-polled as soon as possible.
- If no devices are selected, all devices in the map are moved to the head of the poll queue and are re-polled as soon as possible.
Acknowledge

When Intermapper detects a problem with a device, the device's icon changes to yellow, orange, or red. This serves to attract attention to the failure, but can be distracting after corrective action has been initiated. It also masks further failures: if several items on a map are already in alarm, it is hard to notice new problems.
You can use the Acknowledgment command to indicate that the network administrator is aware of a problem and has initiated corrective action. Acknowledging an alarm turns the device's icon blue and stops repeated notifications for that device.
For more information on the Acknowledgments window, see Acknowledging Device Problems.
You can use this command to restore the flashing icon for a device that has been acknowledged in error or which needs further attention. Un-acknowledging a device reactivates recurring notifications.
Info Window
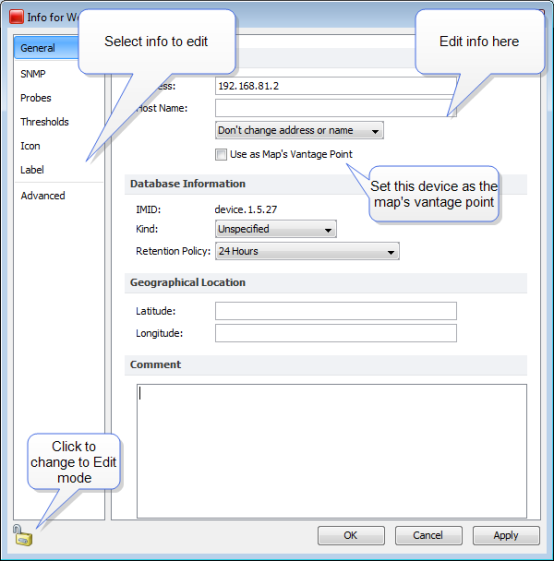
Use the Info window command to view information about the selected device or network.
- Click the lock icon to change to Edit mode.
- Click a button at left to view that Info pane.
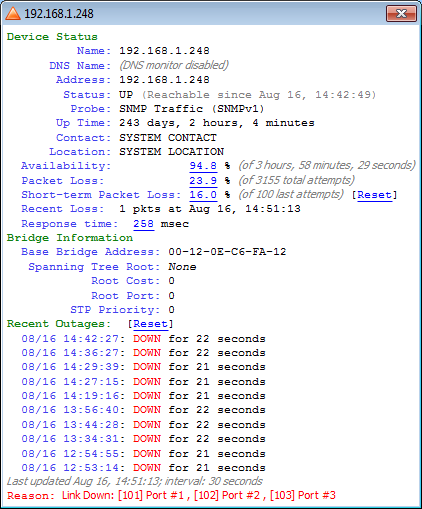
Status Window
Open the Status window for the selected device. This command is active in Map Edit mode, which is useful for creating charts.
The following example shows a Device Status window. Status windows are also available for networks and links. For examples, see Status windows.
Interfaces Window
Open the Interfaces window for the selected device.
Info View
You can use the Info view of the Interfaces window to view the status of interfaces for the selected device, to hide or show them, to specify mapping behavior, and to specify what thresholds to ignore. You can also access the Interfaces submenu for one or more interfaces.
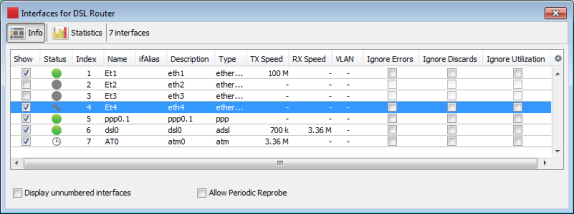
For more information, see Interfaces window.
Statistics View
You can use the Statistics view of the Interfaces window to see various statistics for all interfaces on a device.
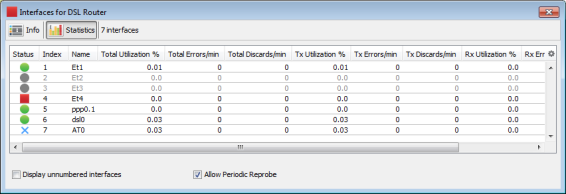
For more information, see Interfaces window.
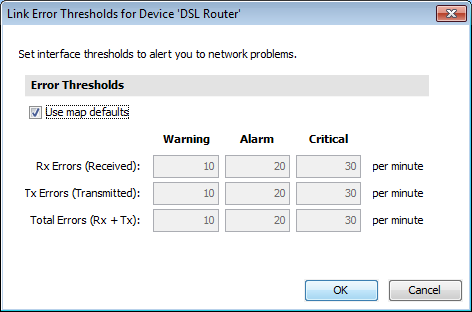
Error Thresholds Window
You can use the Error Thresholds window to override map defaults and set thresholds for link errors on the selected devices. For more information, see Setting Thresholds.
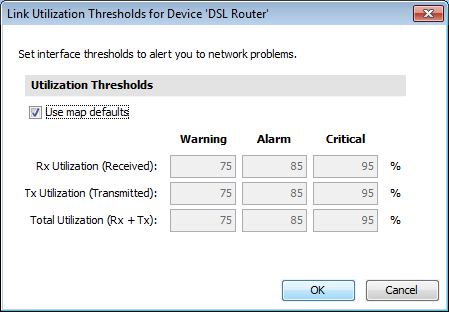
Utilization Thresholds Window
You can use the Utilization Thresholds window to override map defaults and set thresholds for link utilization on the selected devices. For more information, see Setting Thresholds.
Discard Thresholds Window
You can use the Discard Thresholds window to override map defaults and set thresholds for discarded packets on the selected devices. For more information, see Setting Thresholds.

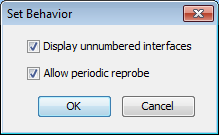
Behavior Window
You can use the Behavior window to set the display and polling behavior of the selected devices. This window is also available from the Context menu; the options are also available from the Interfaces window.
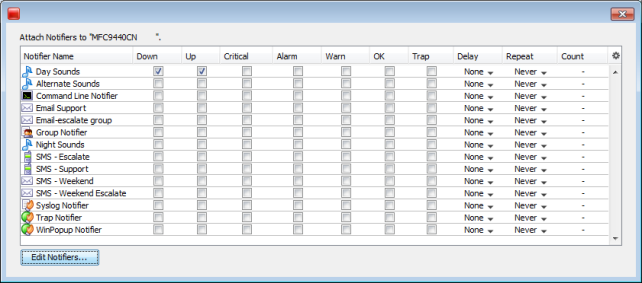
Notifiers Window
Open the Notifiers window for the selected device.
SNMPWalk
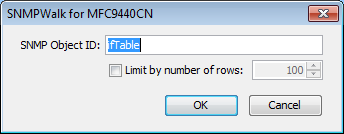
The SNMPWalk dialog
You can use the SNMPWalk command to execute an SNMPWalk on the specified SNMP enabled device. Enter a numeric or textual OID.
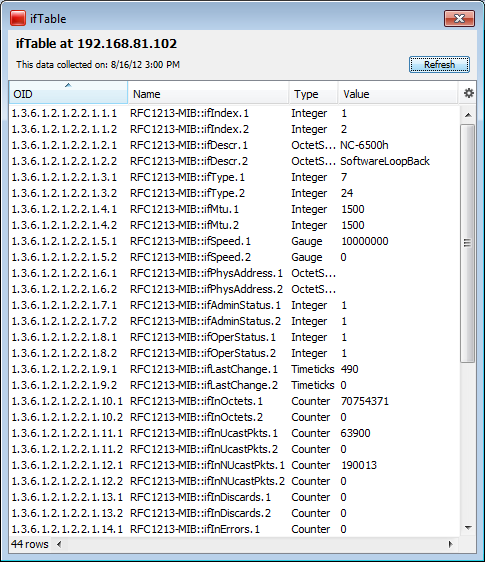
The following example shows the output of an SNMPWalk command with ifTable as the specified OID.
For more information on SNMPWalk, see the Developer Guide.
To perform an SNMPWalk on a probe
- From a map List view, expand the probe group to view the individual probes.
- Right-click the probe you want to perform the SNMPWalk and select SNMPWalk. The SNMPWalk window is displayed.
- Complete the dialog as needed and click OK.
Flows Window
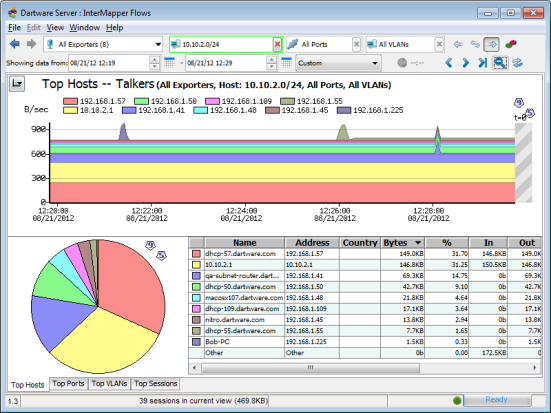
If Intermapper Flows is running, opens the Flows Window, which shows Intermapper Flows information. For more information on Intermapper Flows, see Intermapper Flows.
Show in Layer 2
You can use the Show in Layer 2 command to open the Device List window in Layer 2 view and view the connections to the selected devices.
Reports
You can use the Reports command to open the Reports user interface in a browser window. You can use the Reports window to create, load, edit, and save reports.
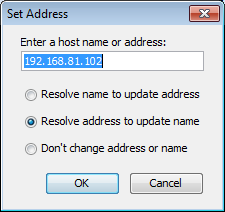
Enter a host name or address - enter a DNS name or IP address here. Intermapper uses this address to probe the device.
Resolve Name to Update Address - Intermapper queries the DNS for the given name, and uses the result to change the address it uses to poll the device.
Resolve Address to Update Name - keeps the specified IP address fixed, but might update the name from the DNS server if one is found.
Set Comment

The comment is displayed in the device's status window. This sets the comment for all the selected devices. For more information on the Comment field, see the Device Status window.
This information is saved as part of the map. You can use the Comment field to save the model and serial number of a device, telephone numbers, circuit numbers, or other information related to the item.
Set Community
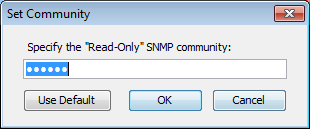
Sets the read-only community string for all selected devices.
The default community string for most SNMP devices is public.
Set Data Retention
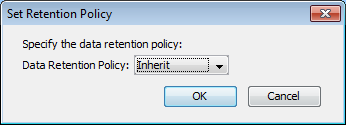
Selects the Data Retention Policy to use when storing data to the IntermapperDatabase. Data Retention Policies are defined using the Intermapper Database Settings page of the DataCenter Administration Panel.
Set Kind
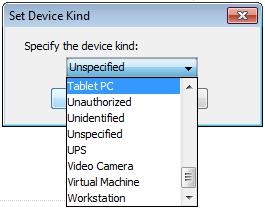
You can set a device kind for each device whose data is stored in the Intermapper database. This can be useful during data reporting or analysis. Use the Set Device Kind dialog to choose the device kind you want to store with the device data.
Set Latitude and Longitude
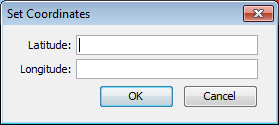
Enter valid latitude and longitude values in the text boxes and click OK. The device is moved to the appropriate location in the map, based on existing benchmarks.
Set Poll Interval
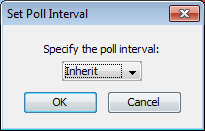
Sets the poll interval for selected devices. This interval is independent of and takes priority over the map's poll interval.
If the device's poll interval is set to Default, the map's poll interval is used.
If a map is set to No polling the device poll intervals are ignored and no devices are polled for that map.
Set Probe
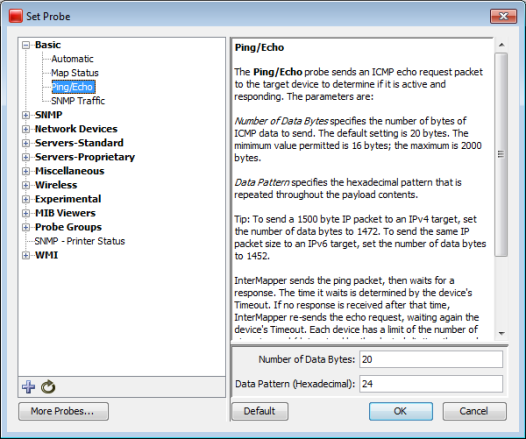
Sets the probe used to query the selected device and the probe's parameters, if applicable. See Probe Reference for details on the available Intermapper probes. For information on creating your own Intermapper probes, see Custom Probes.
- Click the plus sign (+) in the left pane to expand a probe group.
- Click the minus sign (-) in the left pane to collapse a probe group.
- Click a probe in the left pane to select it. Information about the probe and controls for setting any available parameters are displayed in the right frame.
- Click Default to set the probe back to default setting for that probe type.
Set Thresholds
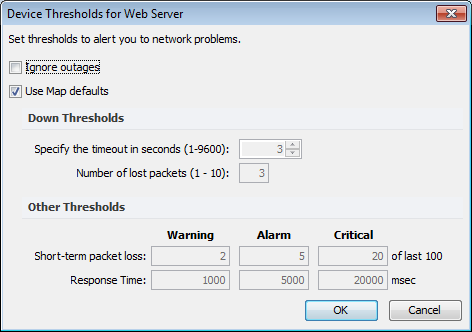
Set the criteria for sending a notification that a device is down, in an alarm state, or in a warning state. These settings apply to all the devices on the map.
- Down - The most serious condition. It means the device is no longer responding to probes. Specify the number of packets that can be lost before declaring the device down.
- Critical - The most serious condition in which responses are still being received. Specify the number of interface errors (per minute) allowed before marking the device as critical.
- Alarm - The next most serious condition. Specify the number of interface errors (per minute) allowed before marking the device in alarm.
- Warning - The least serious error state. Specify the number of interface errors (per minute) allowed before showing the device in warning.
Set Vantage Point

A Vantage Point
Sets the selected device as the Vantage Point from which Intermapper views all other devices on the map. If a device (such as a router or switch) between the Vantage Point and other devices fails, notifications are sent only for the failed device. The other devices are in the shadow of the failed device, and are dimmed on the map.
The Vantage Point specifies Intermapper's virtual point of presence, as if the Intermapper server is directly connected to that item. When the Vantage Point is set on a device, a star is displayed next to the icon.
The Vantage Point is used in conjunction with Intermapper's Notification Dependencies, which suppress notifications for devices that are assumed to be down because some other failure hides or shadows them. For more information, see Notification Dependencies.
Reset Short-Term Packet Loss
Intermapper counts the number of dropped packets out of the last 100. This applies to all packets sent to the device (networks and links are not involved).
Short-term packet loss is displayed in the device's Status sindow as a percentage of the number of dropped packets in the last 100. Use this command to reset the current value to zero.
Helper Apps
Select a device and use this submenu to specify how to launch a helper application. You can also customize this to configure your helper applications.
Set Double-Click
Select one or more map items and use this submenu to specify what action is taken when any of the items is double-clicked. Use double-click actions to launch an Helper Application, URL, or Menu item.
For more information on Double-Click actions, see Using Double-Click Actions.