Configuring SecurID Remote Authentication
To easily authenticate exit point requests on networks with multiple systems, RSA SecurID Agent provides a Remote Authentication desktop application, which allows a user to be defined once, then mapped to user instances across the IBM i network. The user records between the PC and IBM i systems can be synchronised to accommodate both static and dynamic IP addresses.
The following instructions describe how to configure SecurID Remote Authentication to accommodate exit point authentication.
Configuring Settings
Click Settings in the Navigation pane on the left to open the Settings window where you can configure the Remote Authentication Server Port, and enable automatic syncing when the application starts.
Adding Systems
- Install the native IBM i software on all systems that require authentication. See the Powertech RSA SecurID Agent for IBM i Installation Guide on the Fortra Support Portal.
- Open SecurID Remote Authentication and choose Systems from the Navigation pane on the left. The Systems window appears.
- Click Add. The Add System screen appears.
-
Enter the IBM i system's Alias, IP Address, Port and select whether to use Secure Comms.
- Click Save. The system appears in the SecurID Remote Authentication Systems window.
- Repeat the above steps for any additional systems.

Adding Users
- Choose Users from the Navigation pane on the left. The Users window appears.
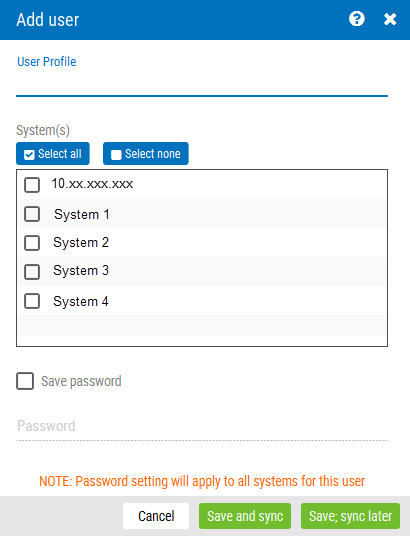
- To add a user whose password is shared between several systems, all of which can be managed together, choose Add User. The Add User screen appears. Then:
- Enter the User Profile.
- Use the Systems window to specify the systems that include this user.
- To save a password, click the Save Password check box and enter the password in the text field below.
- Click Save and Sync to save the User/System mapping and synchronize the user.
- Click Save, Sync Later to save the User/System mapping without saving.
- To add a user for a specific system, choose Add User/System. Then:
Enter the User Profile.
- Specify the system.
- To save a password, click the Save Password check box and enter the password in the text field below.
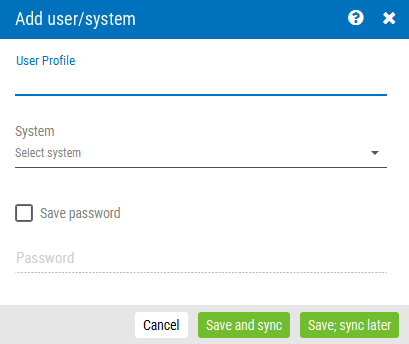
Click Save and Sync to save the User/System mapping and synchronize the user.
- Click Save, Sync Later to save the User/System mapping without saving.
Syncing
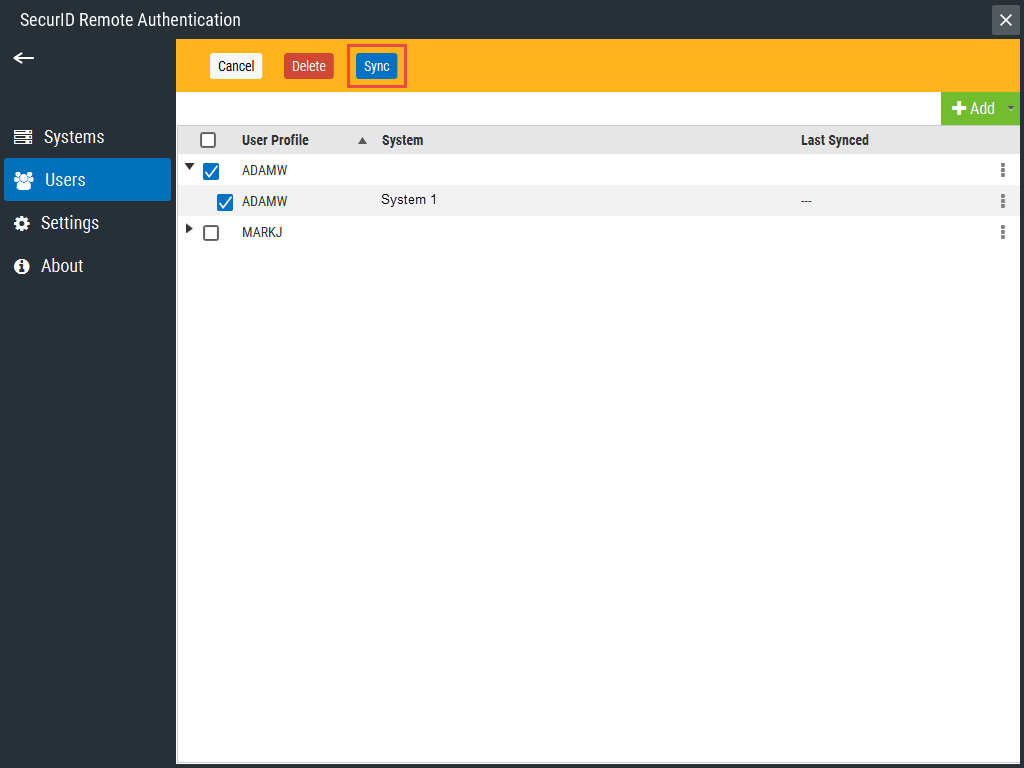
To sync at any time, in the Users screen, select the systems and/or users you would like to synchronize, and click Sync.
When you sync, SecurID Remote Authentication populates the required information into SecurID. See the Work with TCP/IP Addresses for Profiles screen to review this information.
If passwords for Users have not been saved, you are given the opportunity to specify a password prior to processing the sync. See Sync screen.
Configuring the IBM i Agent Software
To configure the SecurID Agent for remote authentication, see the following: